

This is my 3D printing setup, built in summer 2025. It outperforms my old dorm setup and cost a total of around £300:
It can print engineering materials with melting points up to 350 °C, using a 60 °C heated chamber, 120 °C heatbed, and runs at 600 mm/s with 20,000 mm/s² acceleration.
The printer is also networked, so it can be controlled from anywhere in the world.
The setup consists of:
- Qidi Q1 Pro printer
- Kingroon filament dryer
- 3D printed parts
- Custom networking
Why the Qidi Q1 Pro printer?
- As I am in Hong Kong, the made-in-China QIDI Q1 Pro cost only £240 plus a £40 shipping fee from Taobao.
- It can achieve the specs mentioned above while maintaining good print quality, thanks to a 300W chamber heater, coreXY motion system, advanced input shaping, and full enclosure.
- It runs open-source Klipper firmware, using a 4-core ARM CPU (Rockchip RK3328 SoC), with 1GB DDR3 RAM and 32GB of EMMC storage on a version of Armbian Linux.
- It even have a LAN port, WIFI support and a 1080p camera.
- It allows me to print materials I couldn't before, such as ABS, ASA, PC, and Nylon.
The Kingroon filament dryer
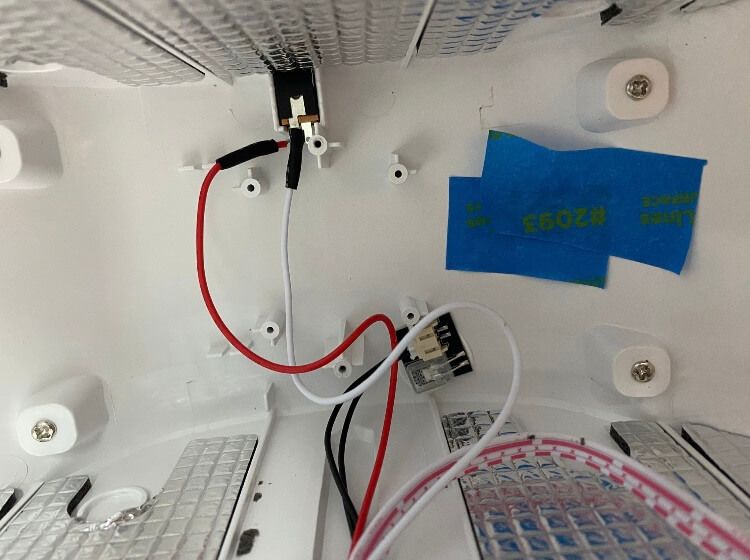
- I bought it because it is the cheapest dryer that advertises a 70 °C drying temperature at £10, but it actually only reaches 45 °C initially.
- This is because they forgot to include a 24V fan in my unit, as seen in image 2.
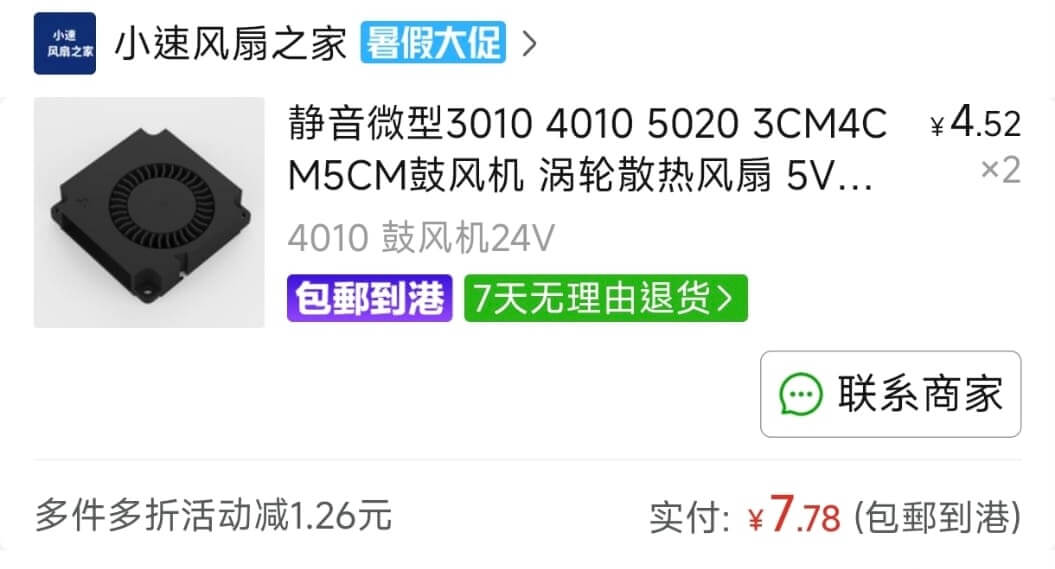
- They refunded me £1.50, which was enough to buy two 24V 4010 fans, seen in image 3.
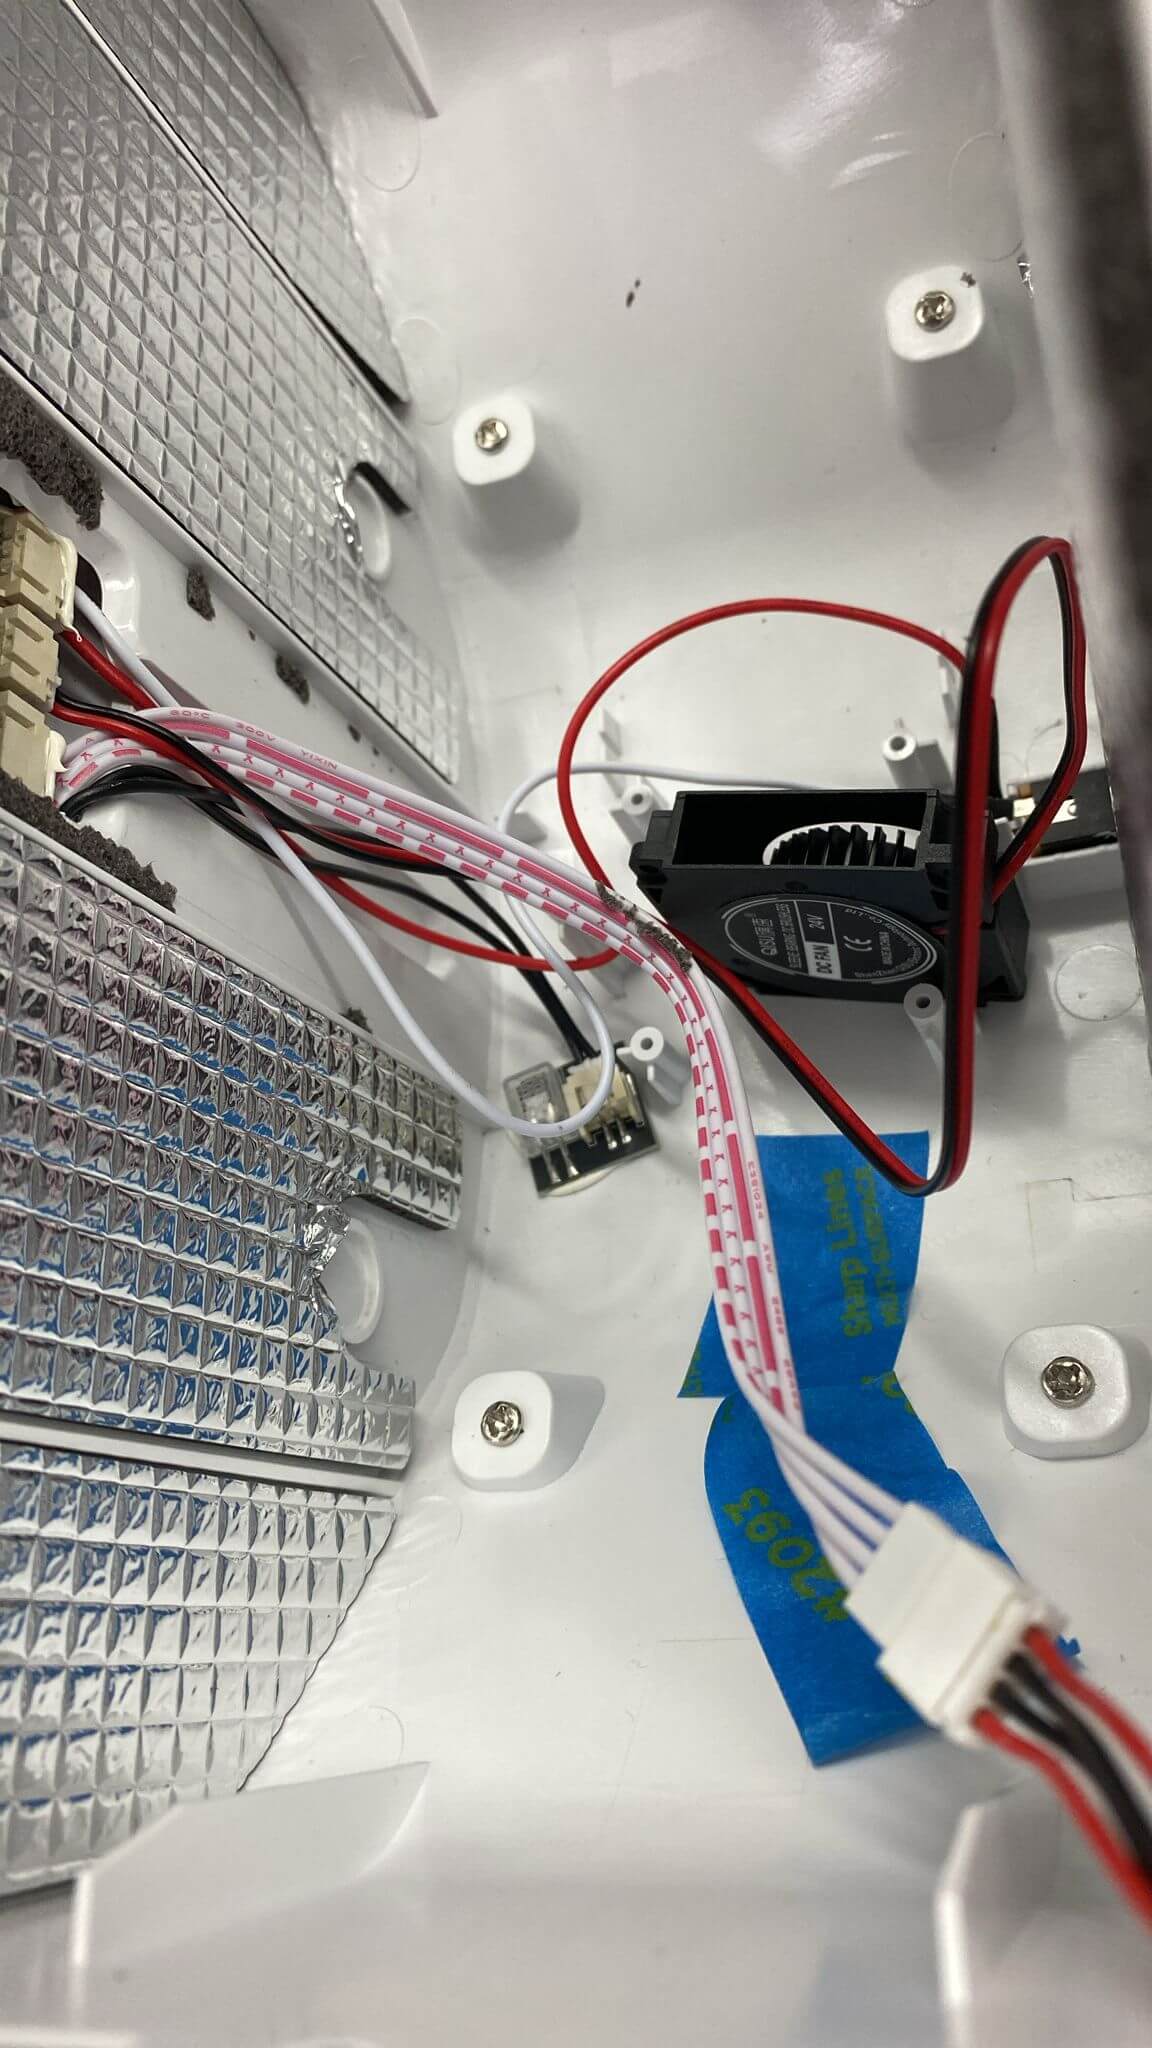
- I installed the fans, lubricating them with some WD40 PTFE lubricant, as seen in image 4.
- It can then reach about 55 °C-60 °C, but not the advertised 70 °C. Still, it is usable.
3D printed parts
-
Parts included in the setup:
- Activated carbon & HEPA filter filtration system
- PTFE tube clips
-
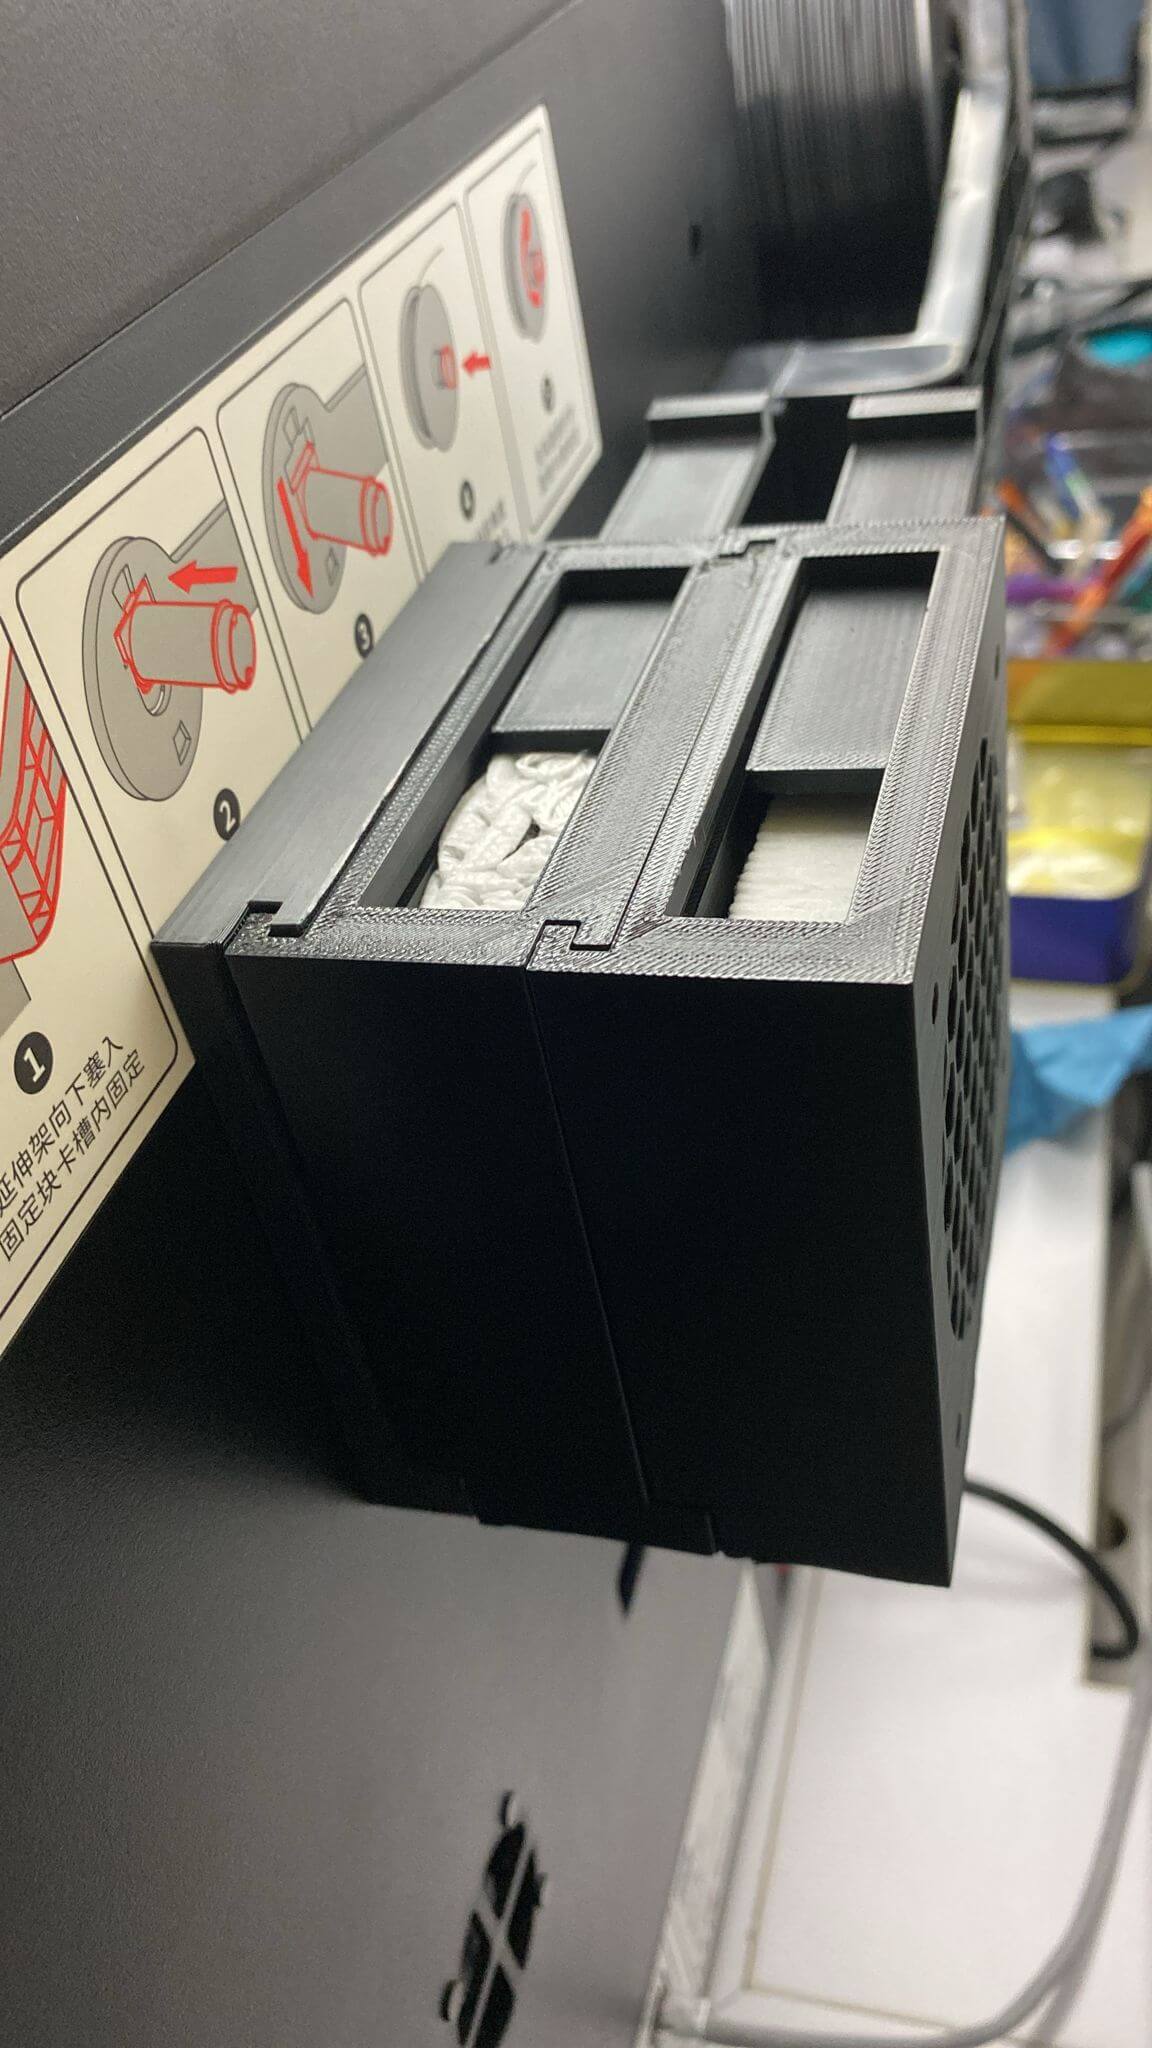
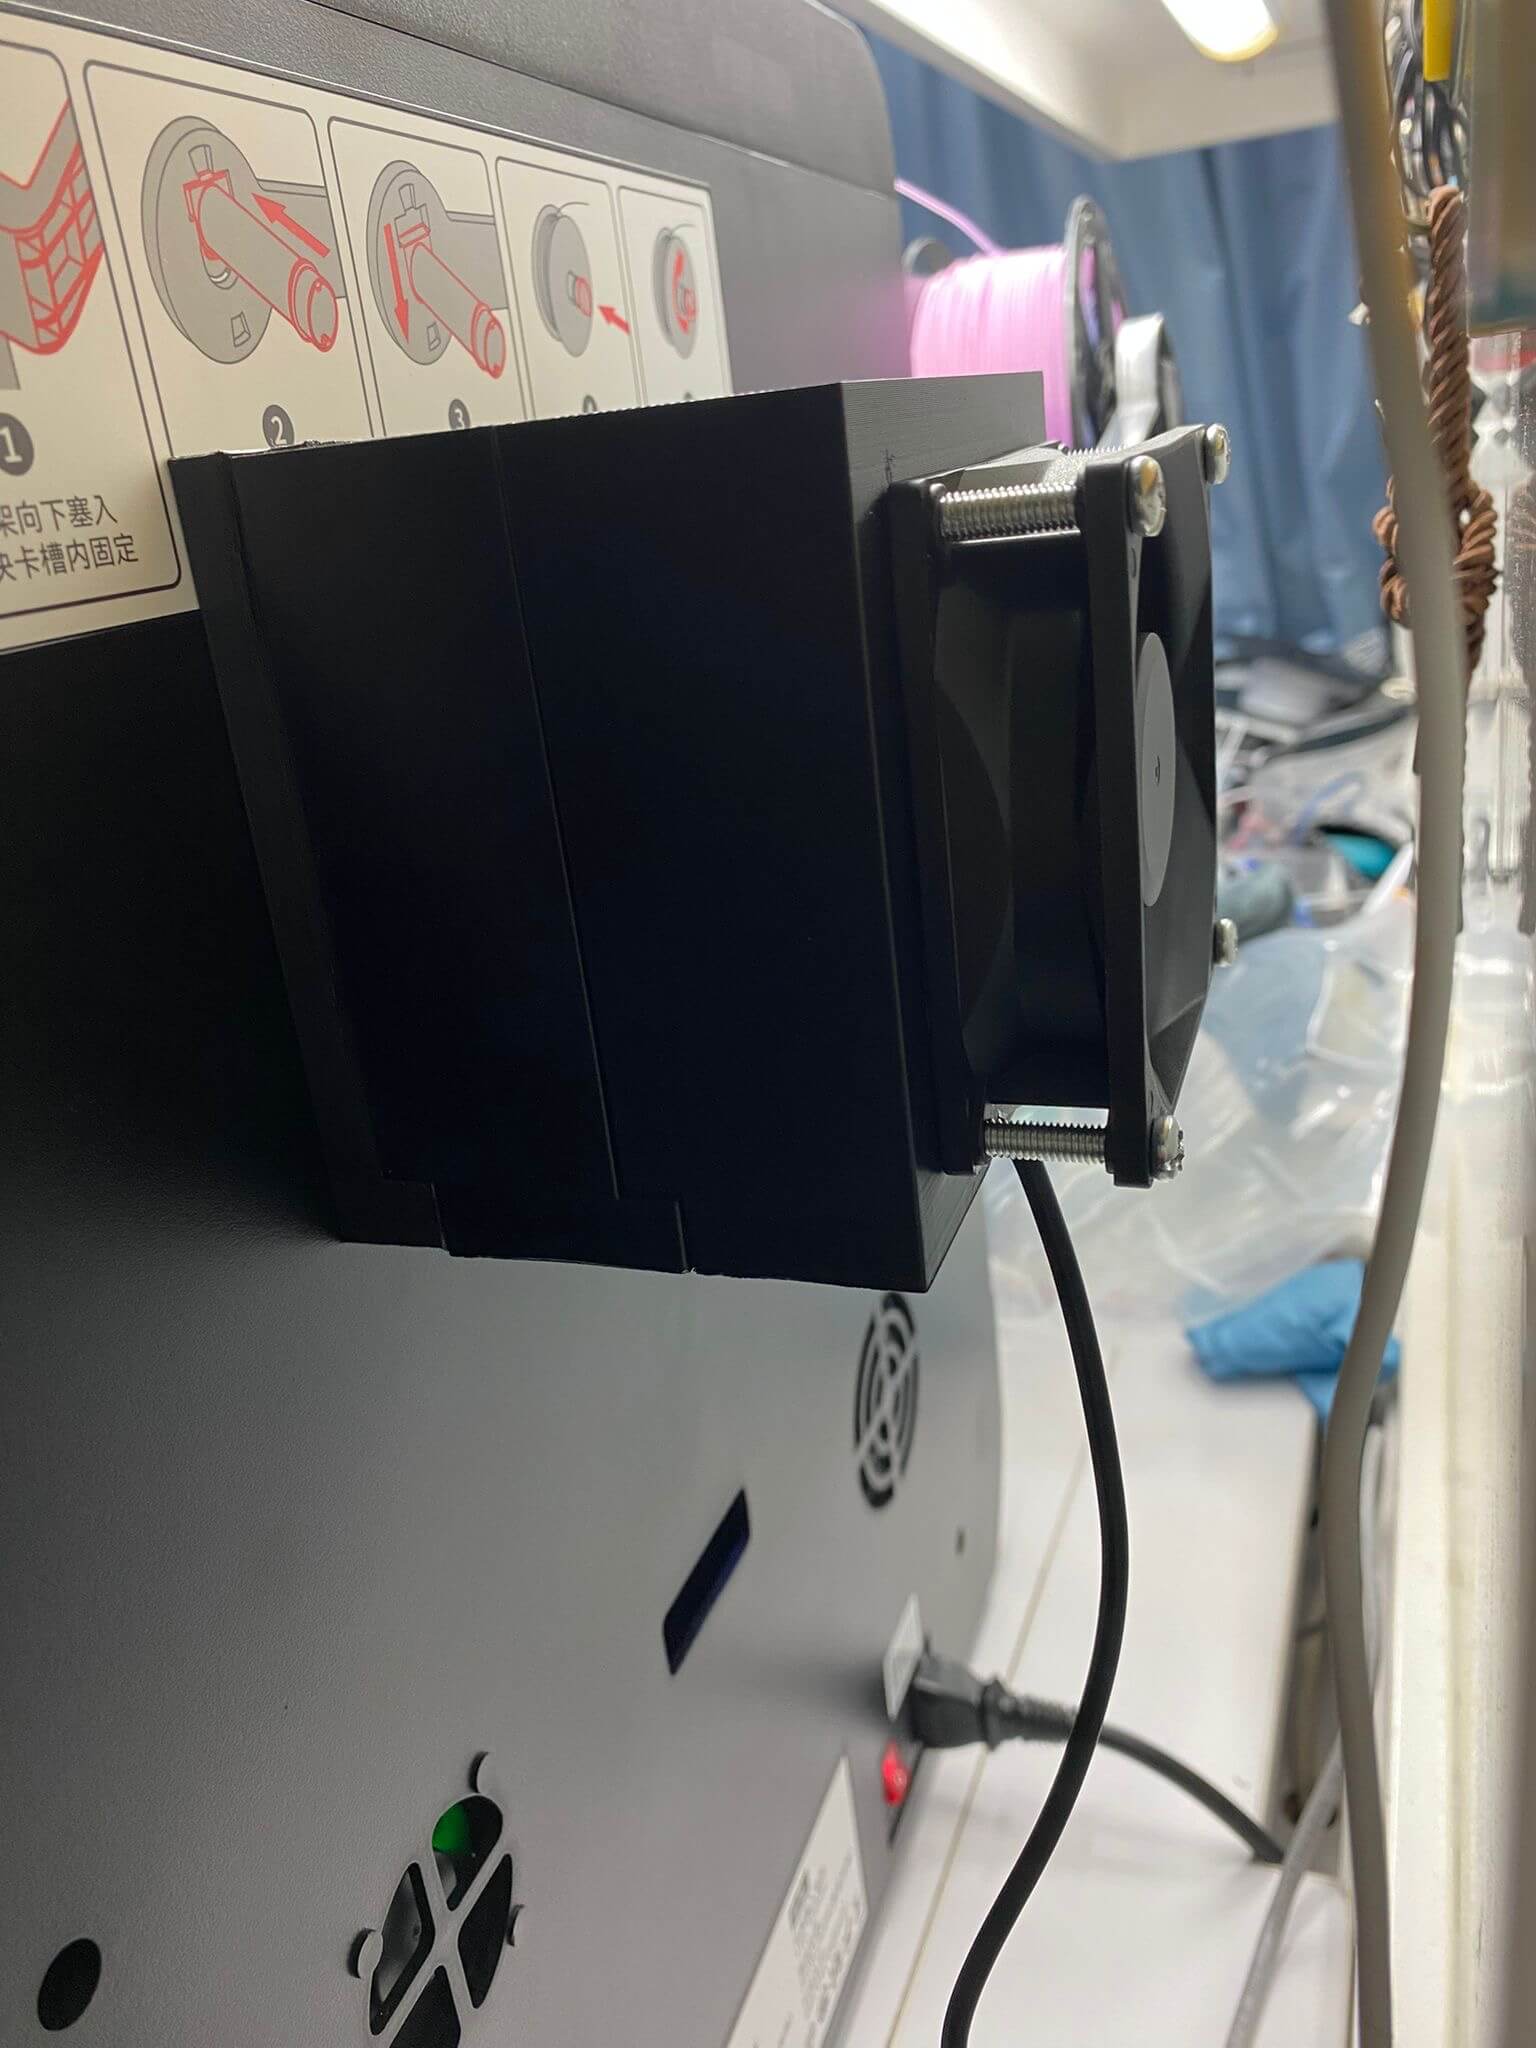
Activated carbon & HEPA filter filtration system (seen in images 5, 6, 7)
- The system consists of a chamber fan duct, filter container mount, two filter containers, and a 5V 8025 fan.
- The chamber fan duct, filter container mount, and the filter containers are printed out of ABS to resist high temperatures.
- I bought the fan, activated carbon, and HEPA filter for about £3.
- The fan draws power from a 5V USB port designed for gcode transfer, which is otherwise unused since the printer is networked.
- The models were downloaded from here.
-
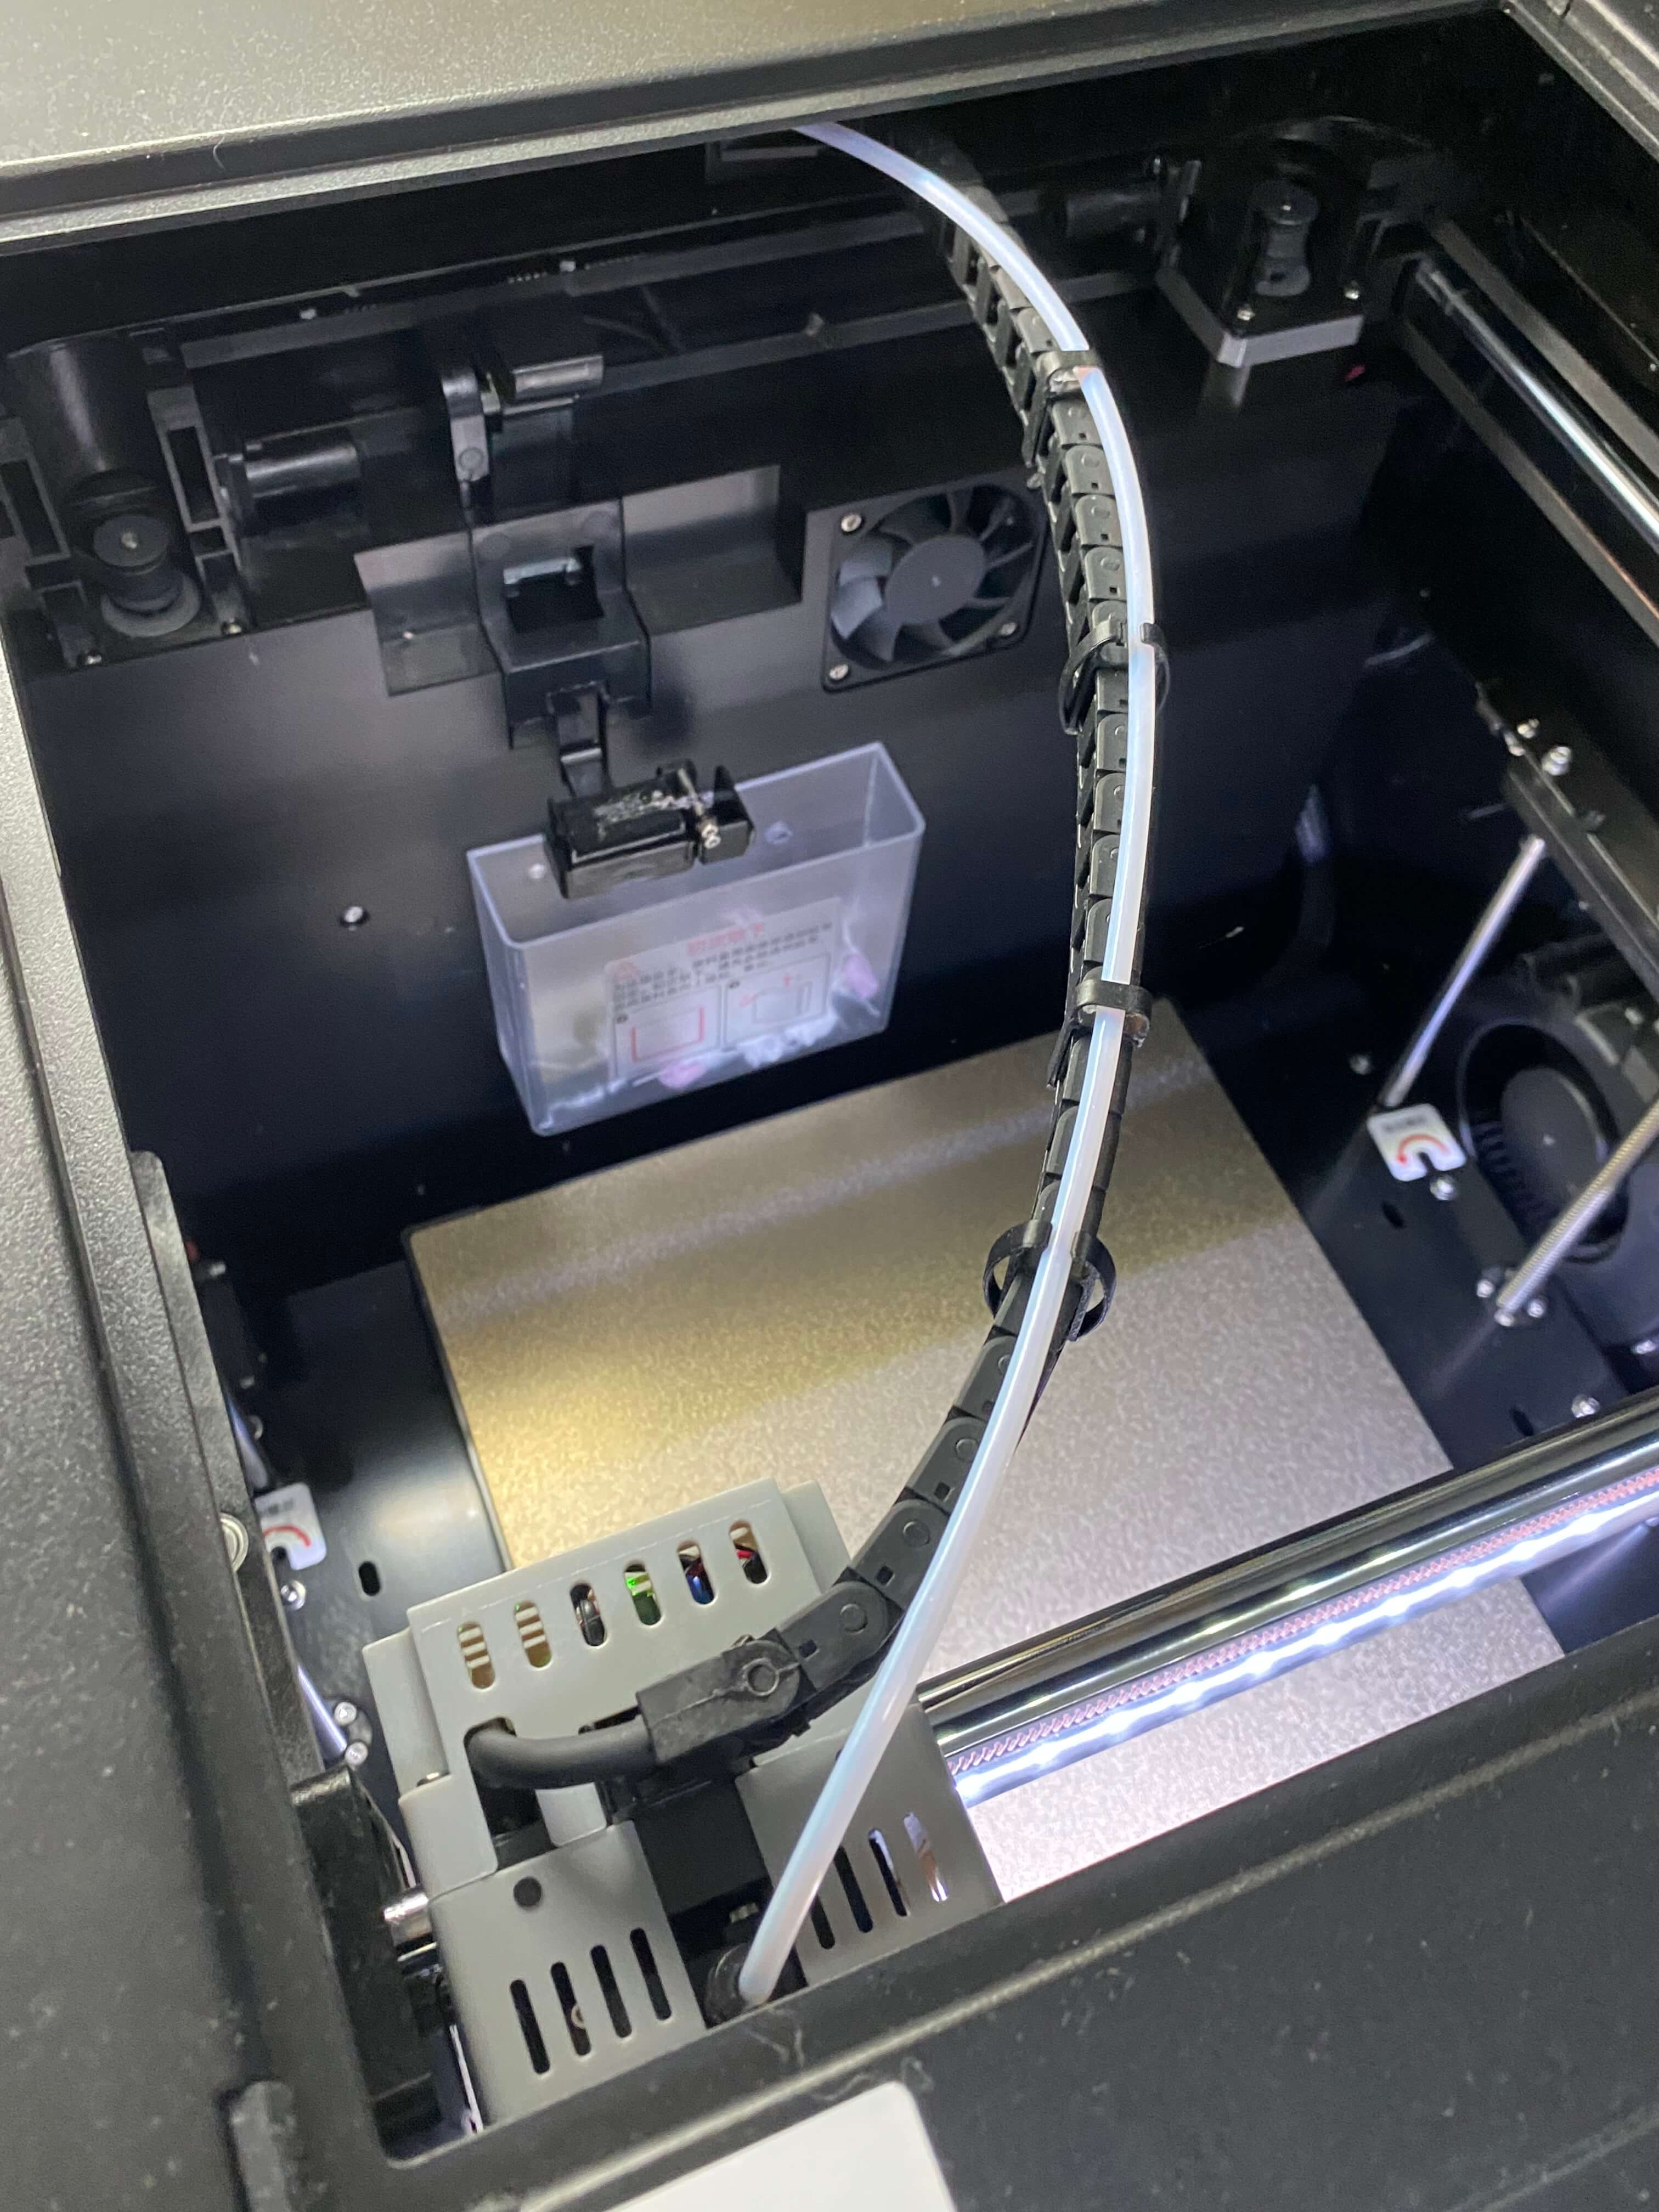
PTFE tube clips (seen in image 8)
- Without these ABS clips, the PTFE tubes would rub against the top polycarbonate panel and cause deep scratches.
- I received a replacement top panel under warranty due to the original being scratched by the tubes, as seen in image 9.
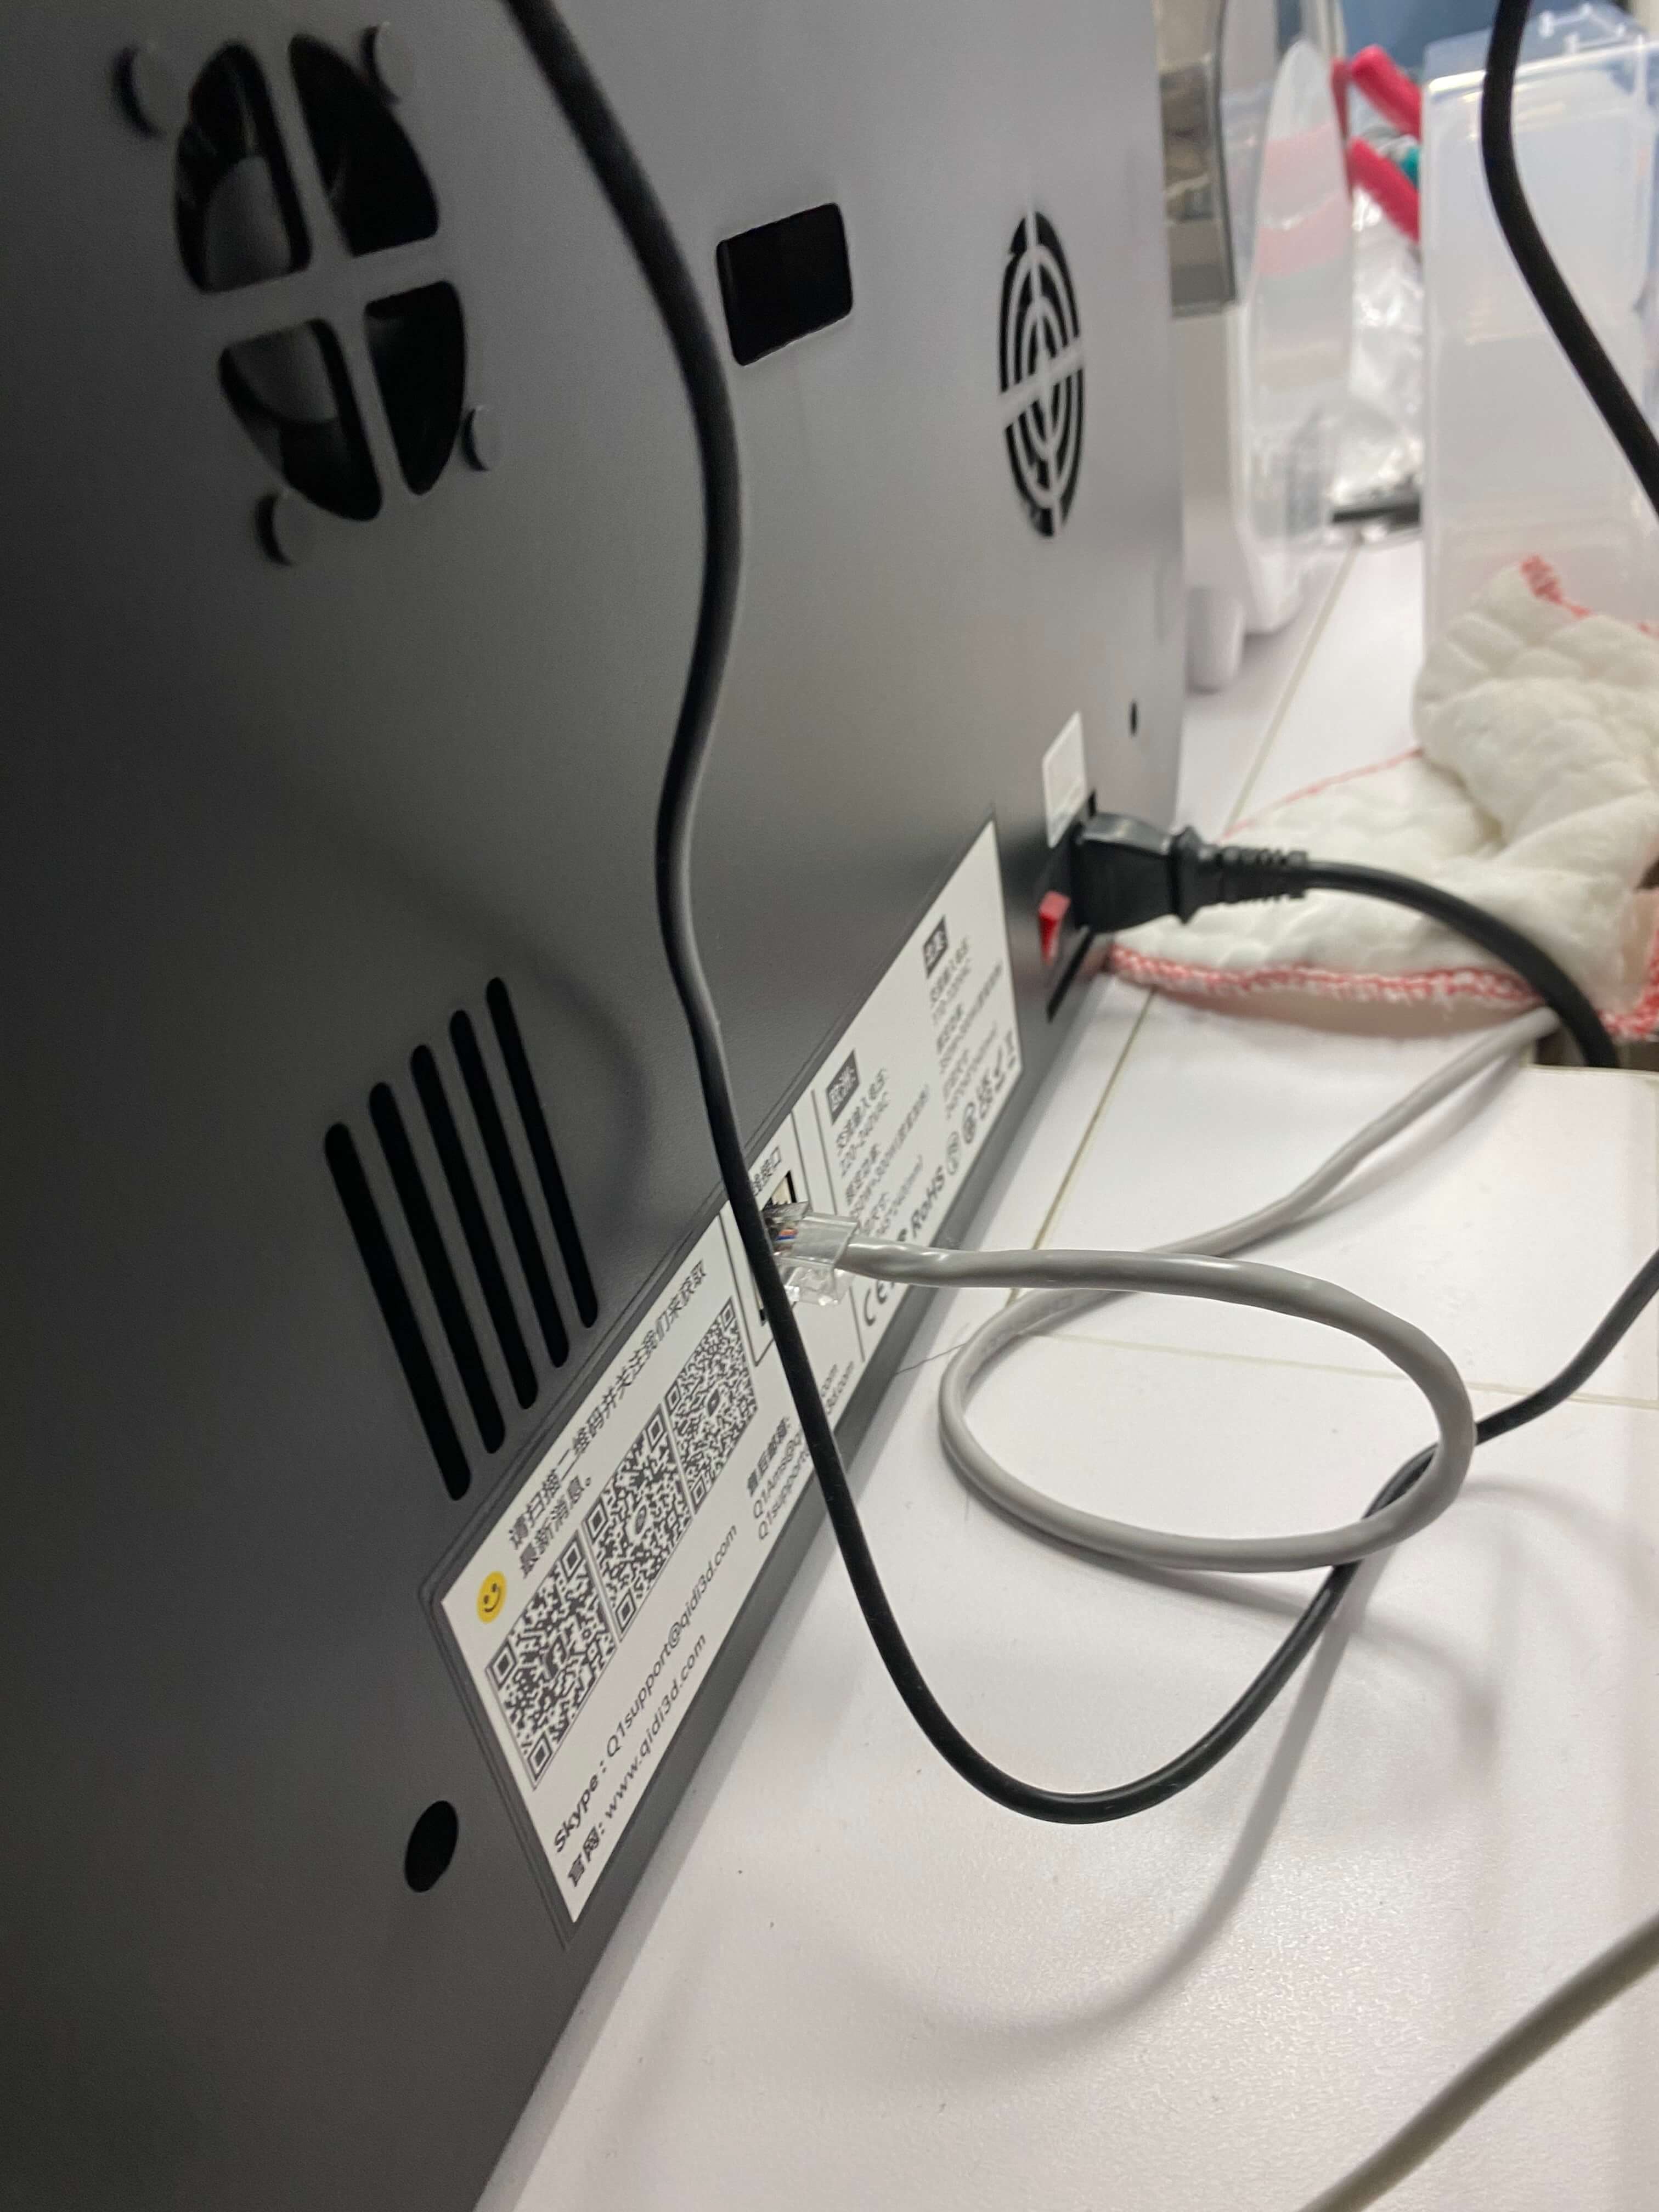
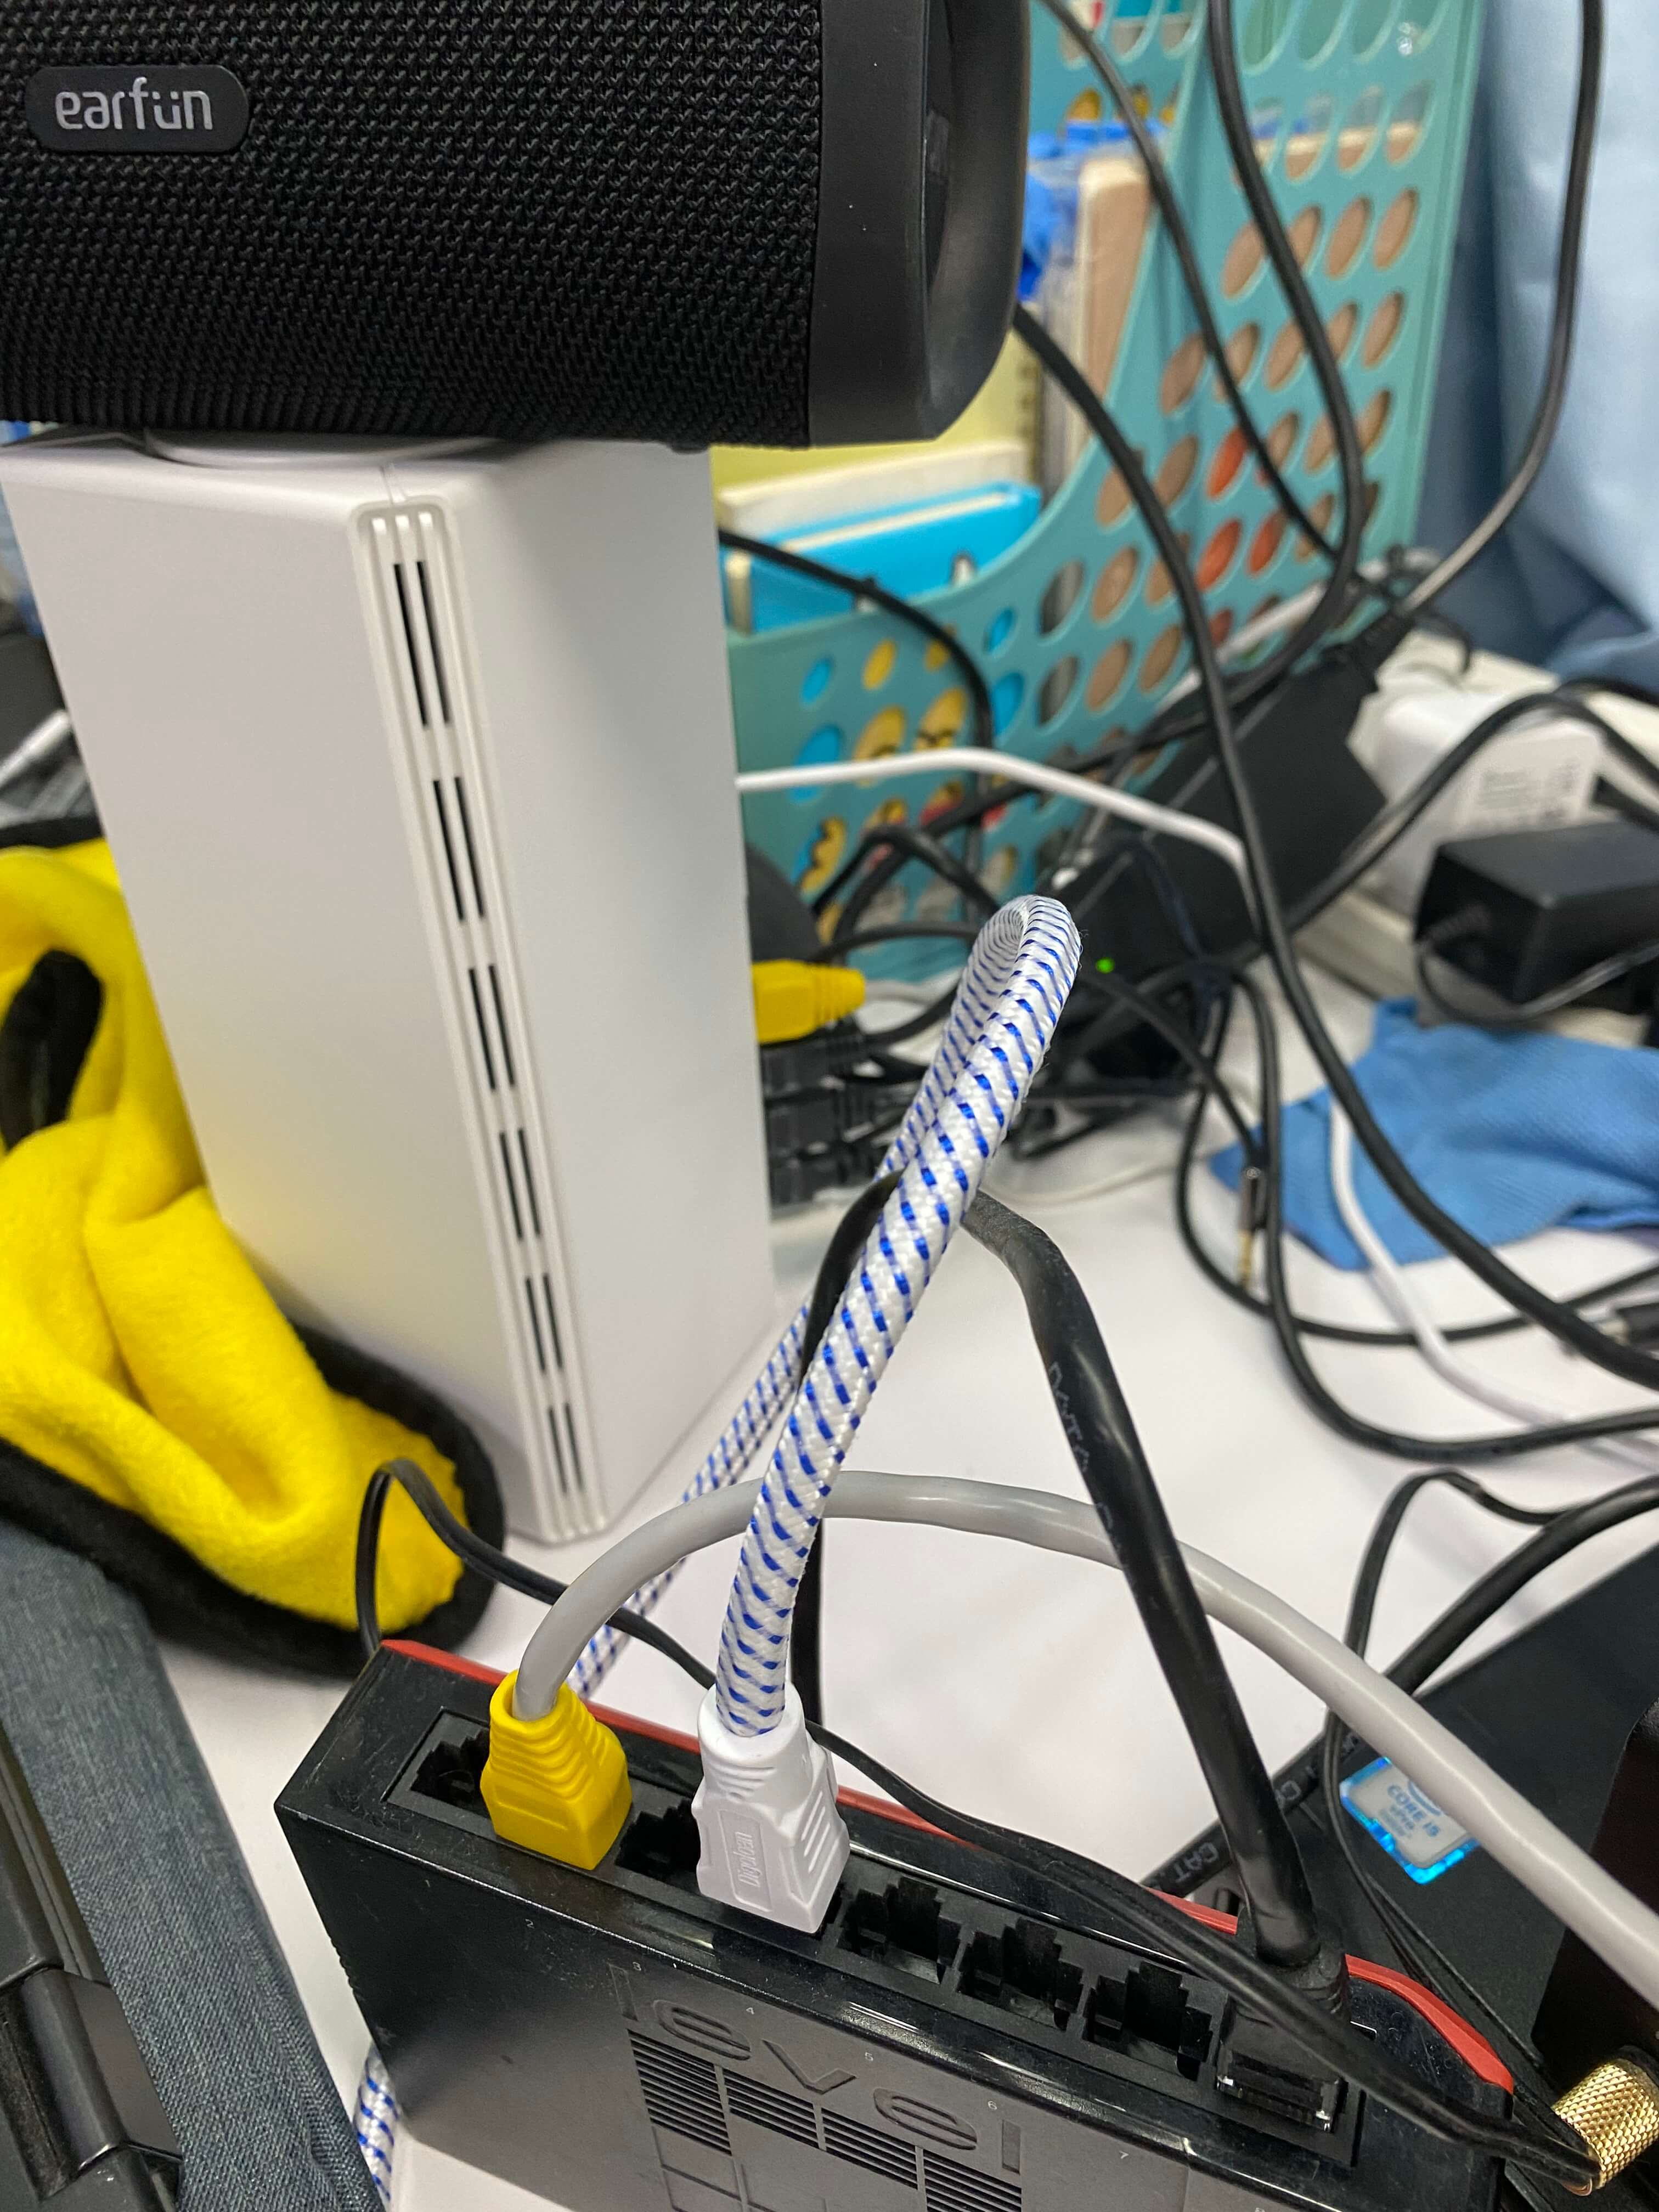
Custom networking (seen in images 10, 11, 12, 13)
- As I have the revised Qidi Q1 Pro, my unit has an LAN port, allowing me to clip a correct length ethernet cable, and connect it to a network switch.
- The switch is then connected to my router, a switch is used cause I ran out of LAN ports on my router.
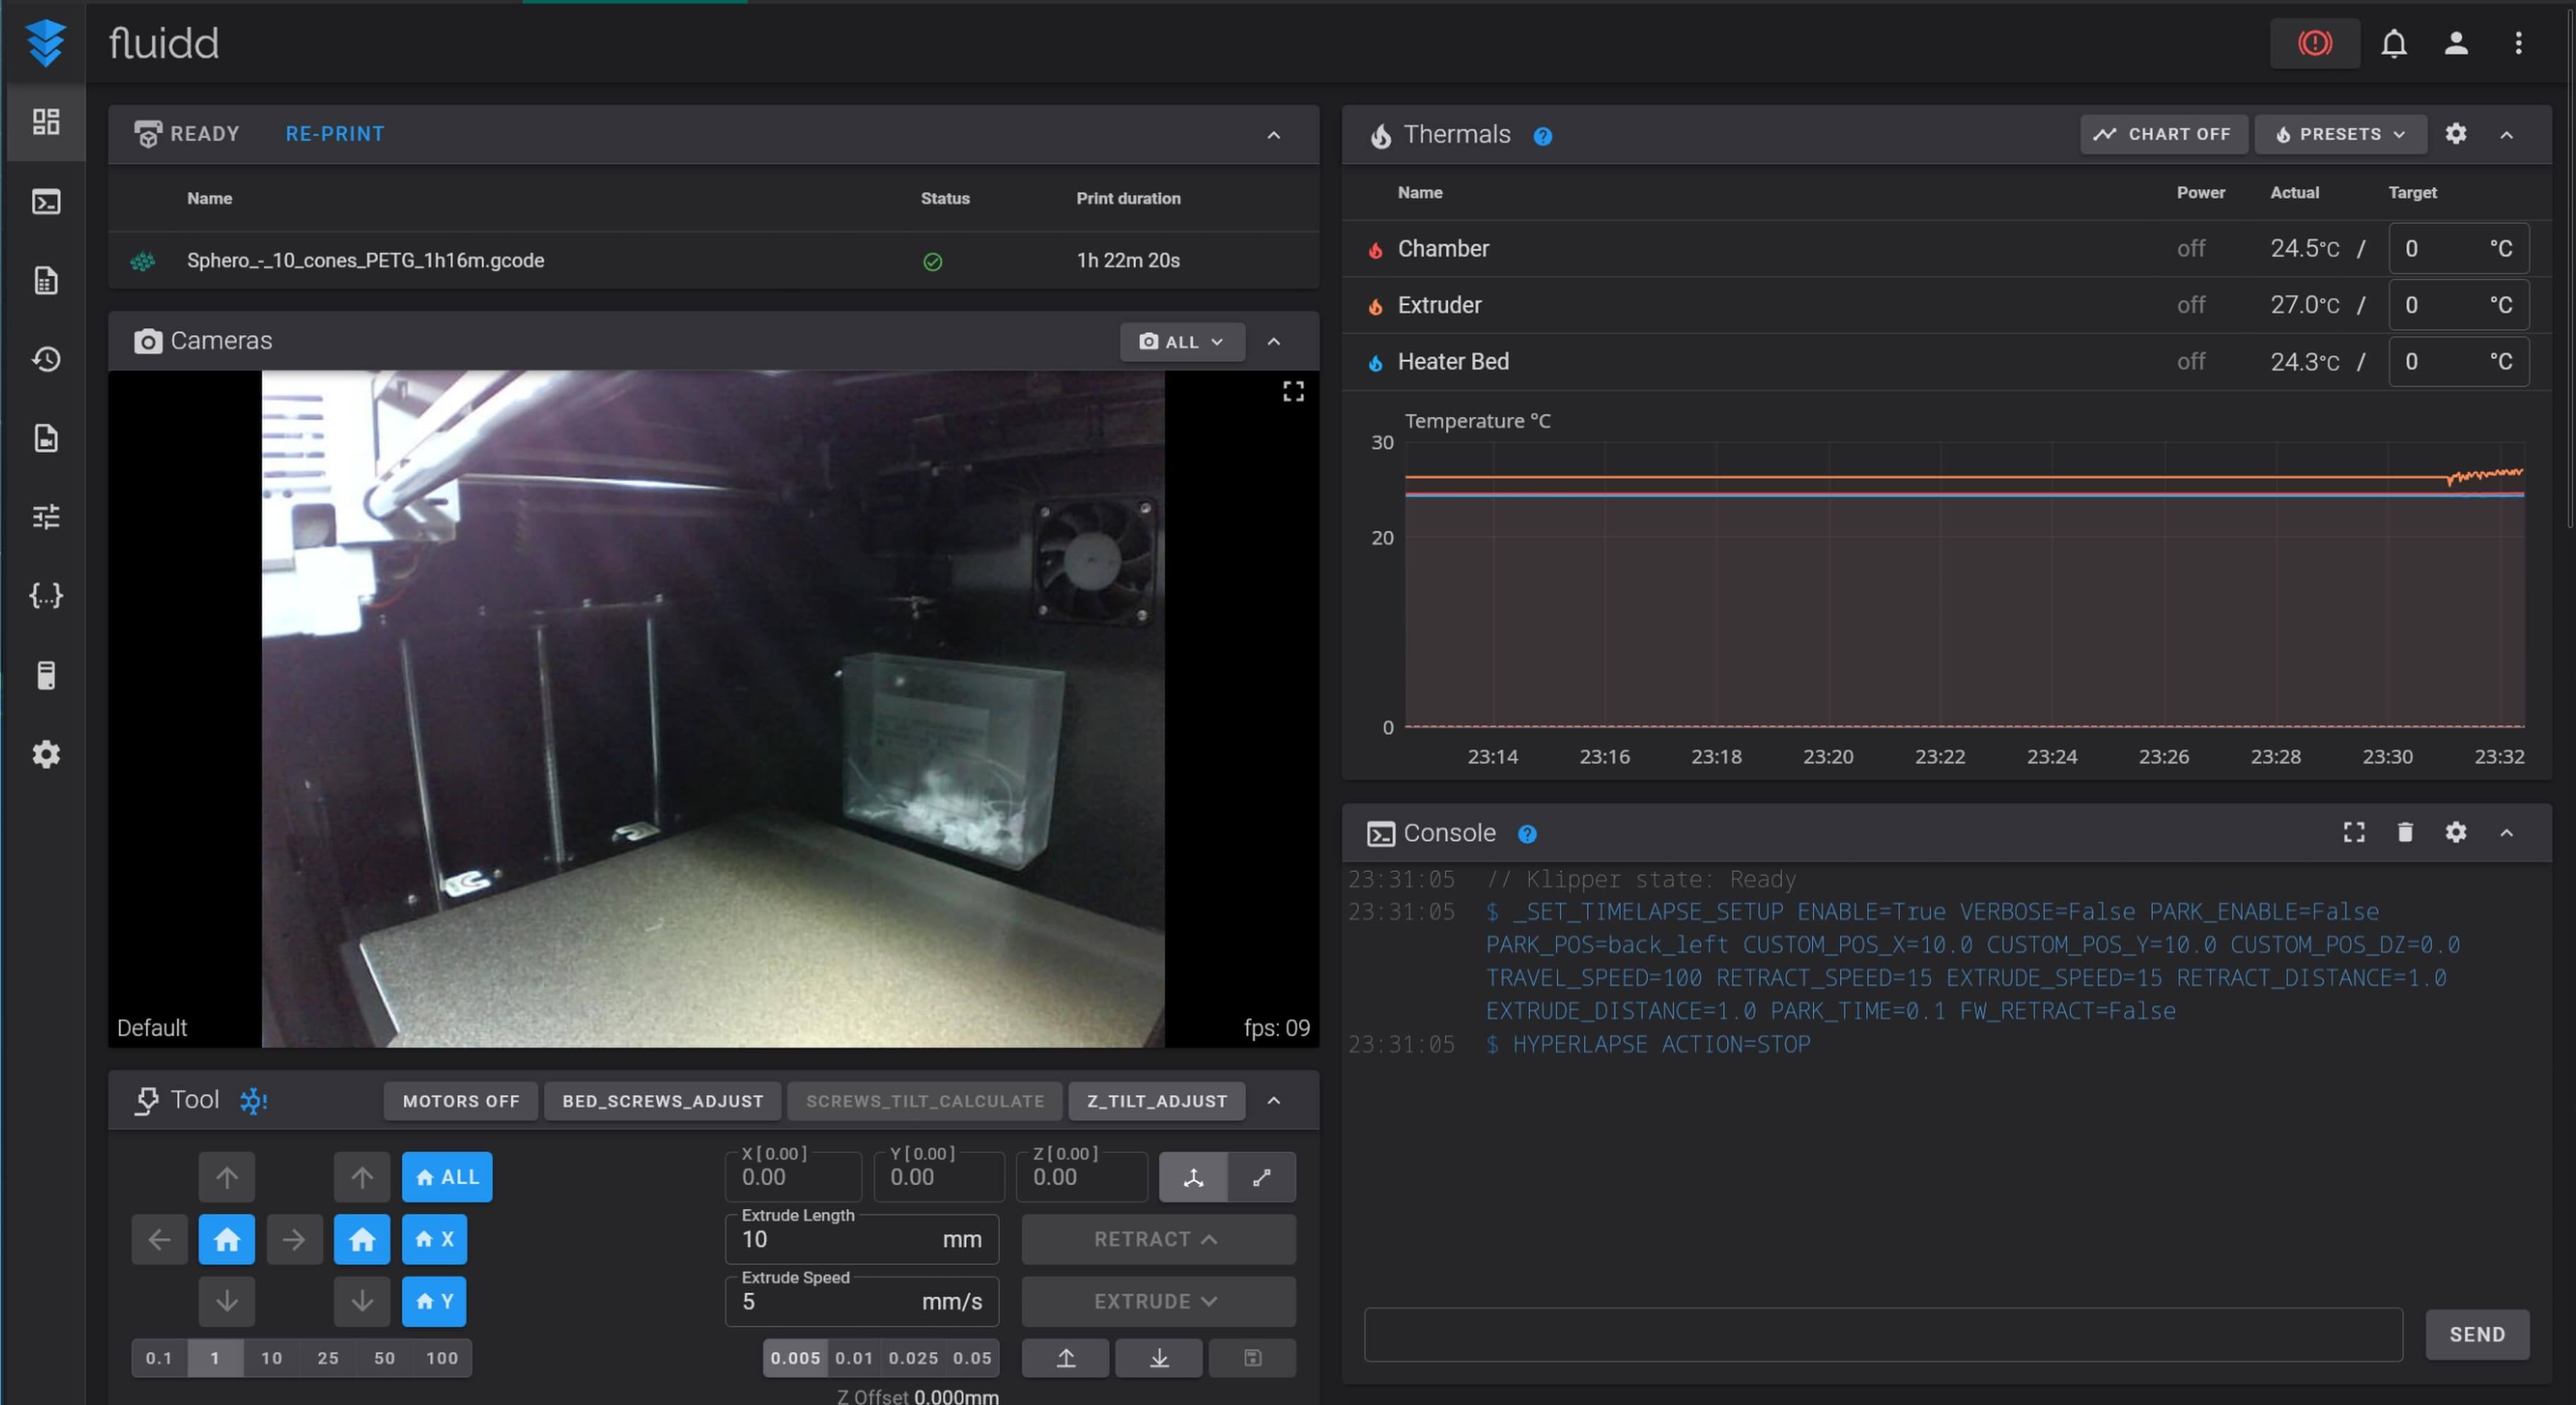
- The Klipper firmware is controlled through the Fluidd web server running on port 10088, which communicates with Klipper via the Moonraker API.
- A VPN like Tailscale is then needed, to allow me to access the web server on the printer from anywhere in the world.
- I tried to install Tailscale natively on the printer's onboard computer, but after SSHing into the device, the specific Klipper version supported by Qidi and the Tailscale client had dependency version conflicts.
- I therefore exposed my home network as a Tailscale subnet via my home NAS, allowing me to connect to my printer remotely as long as my home NAS is online.