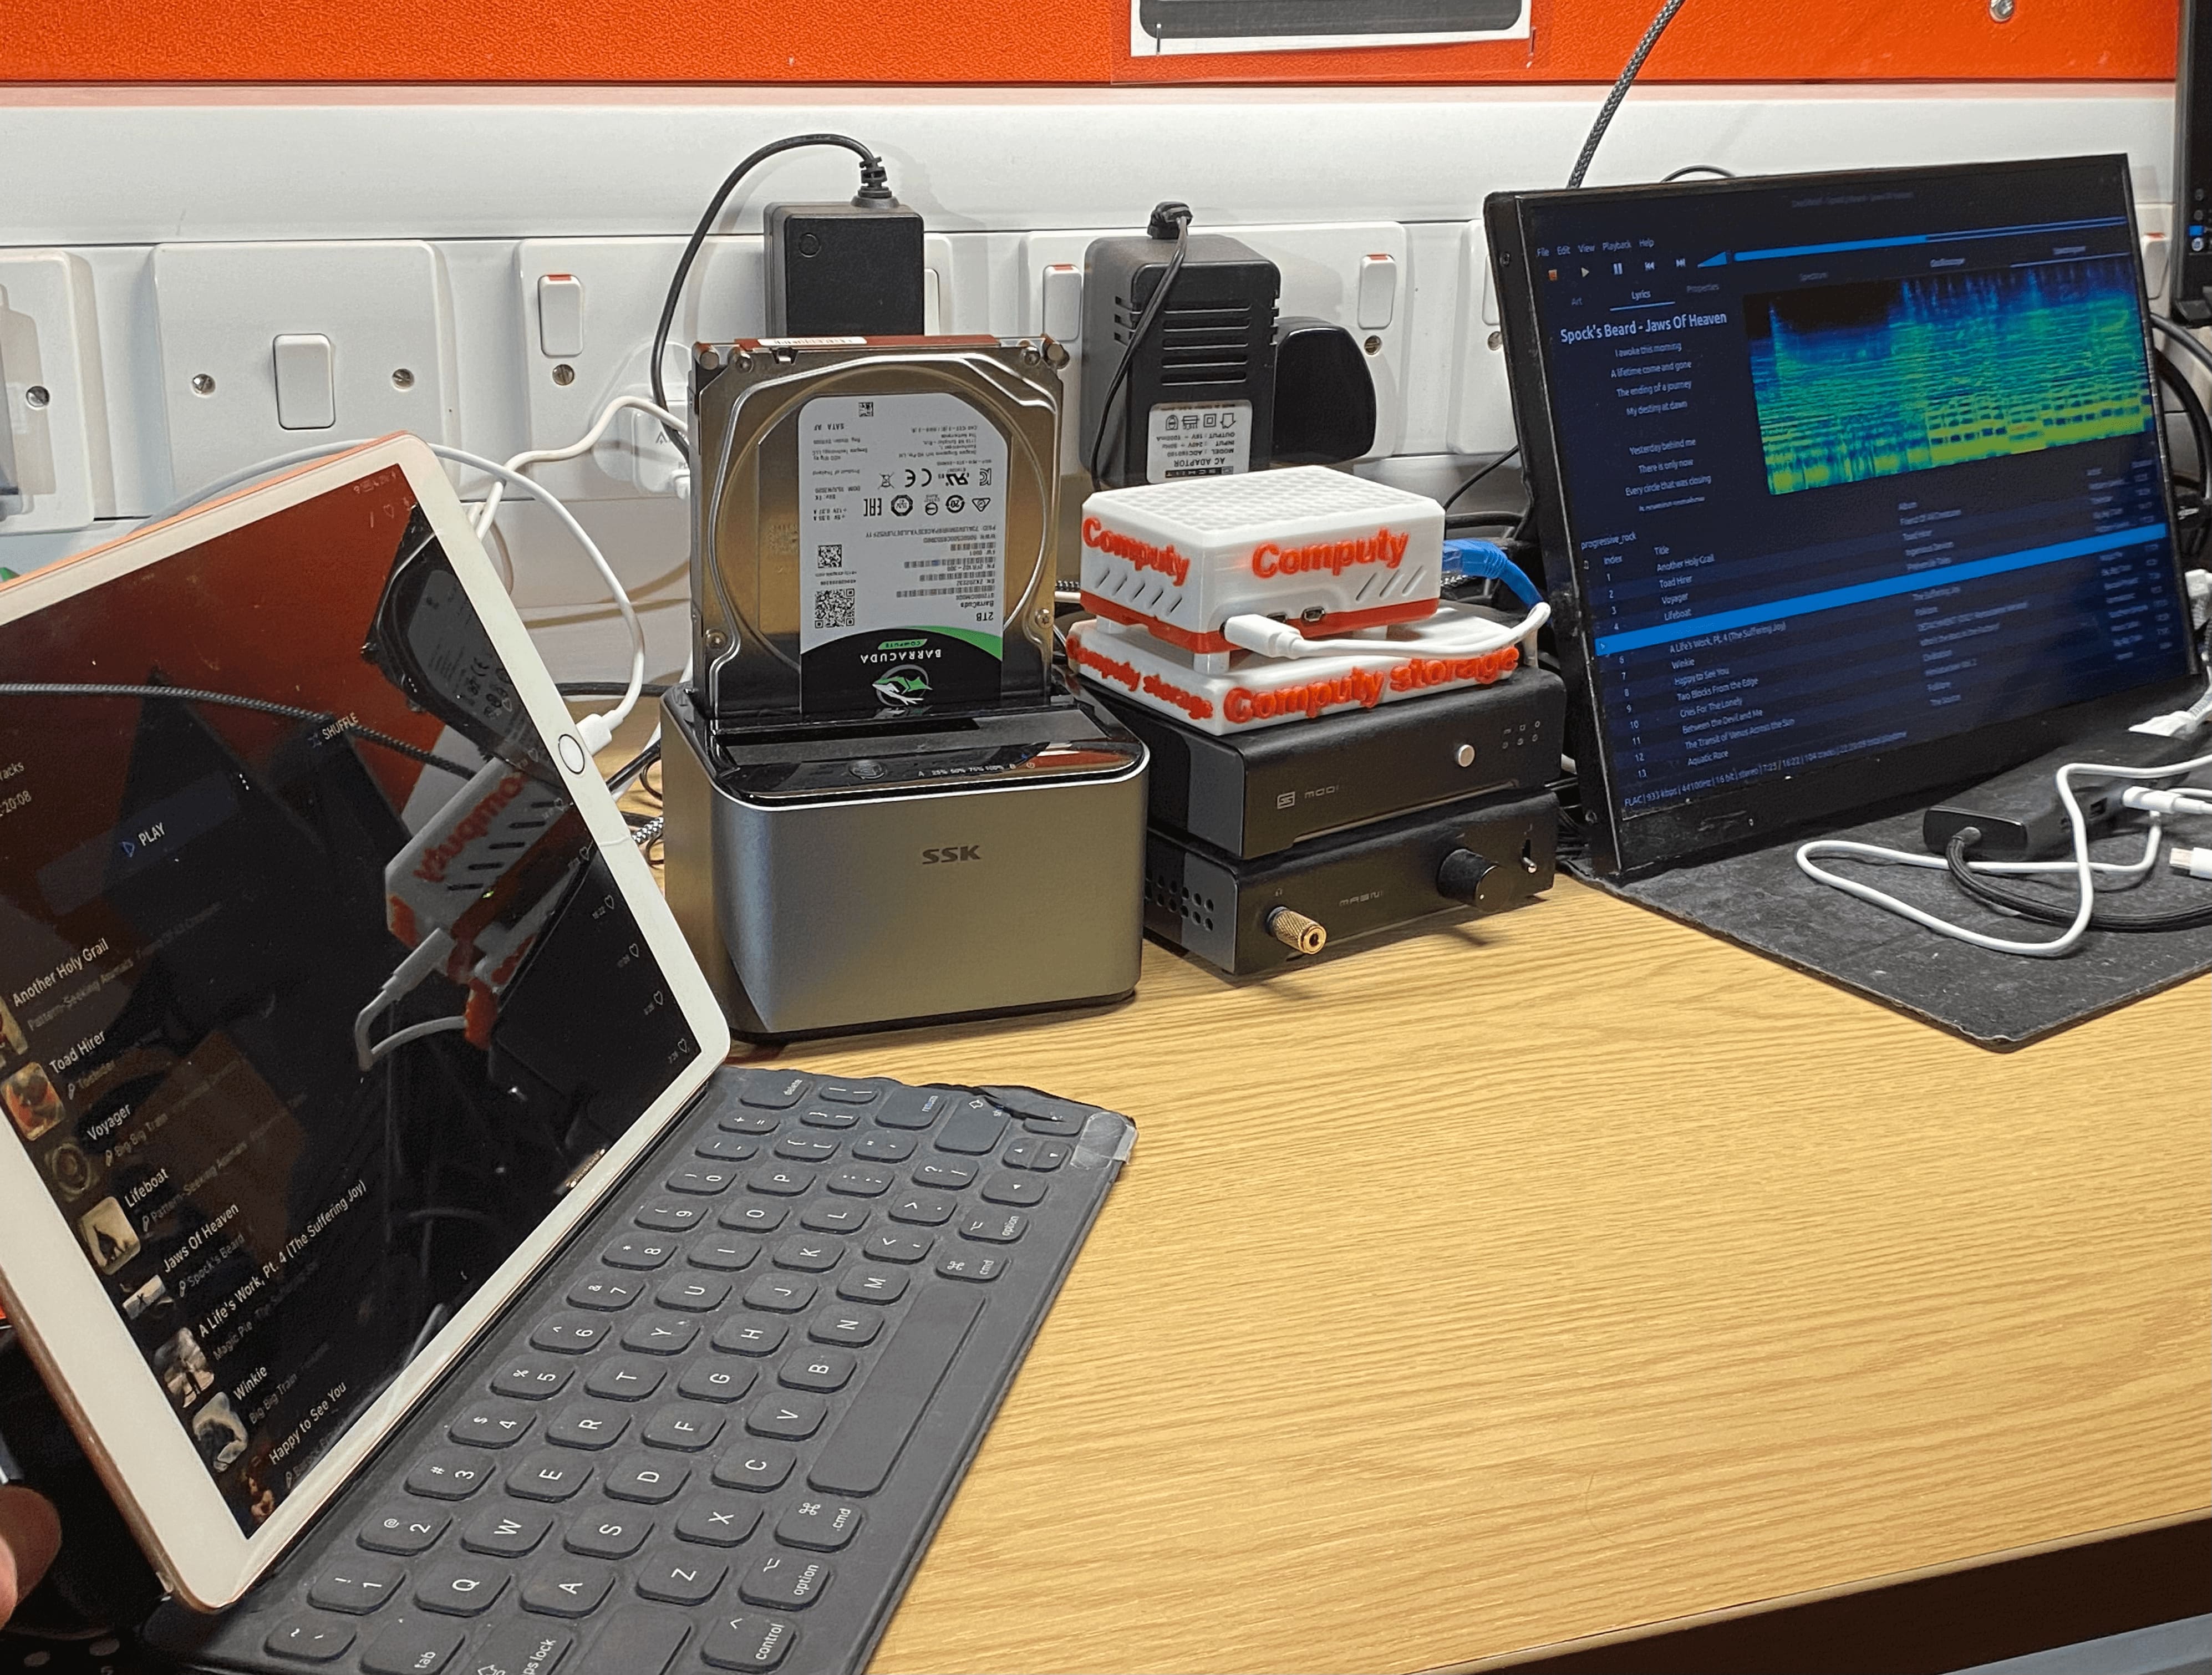

This is my NAS(network attached storage), media streaming server and general server, I set up in my first-year dorm at the University of York, which does not break any university rules.
What is the justification for setting this up?
- I had over 300GB of media files stored on my 1TB NVME SSD on my laptop before this
- I could not access the 300GB of media files on my other devices.
- My laptop and music library were not backed up.
- I needed a computer that runs 24/7 to execute scripts, instead of running scripts on the cloud.
- Having a NAS is very convenient for day-to-day life—for example, it lets you work on the same files from different devices and transfer files between them
This project can be split into two main parts
-
Hardware:
- Server hardware
- 3D printed parts
-
Software:
- Networking configurations
- Media steaming server
- NAS
- Backups
Server Hardware
-
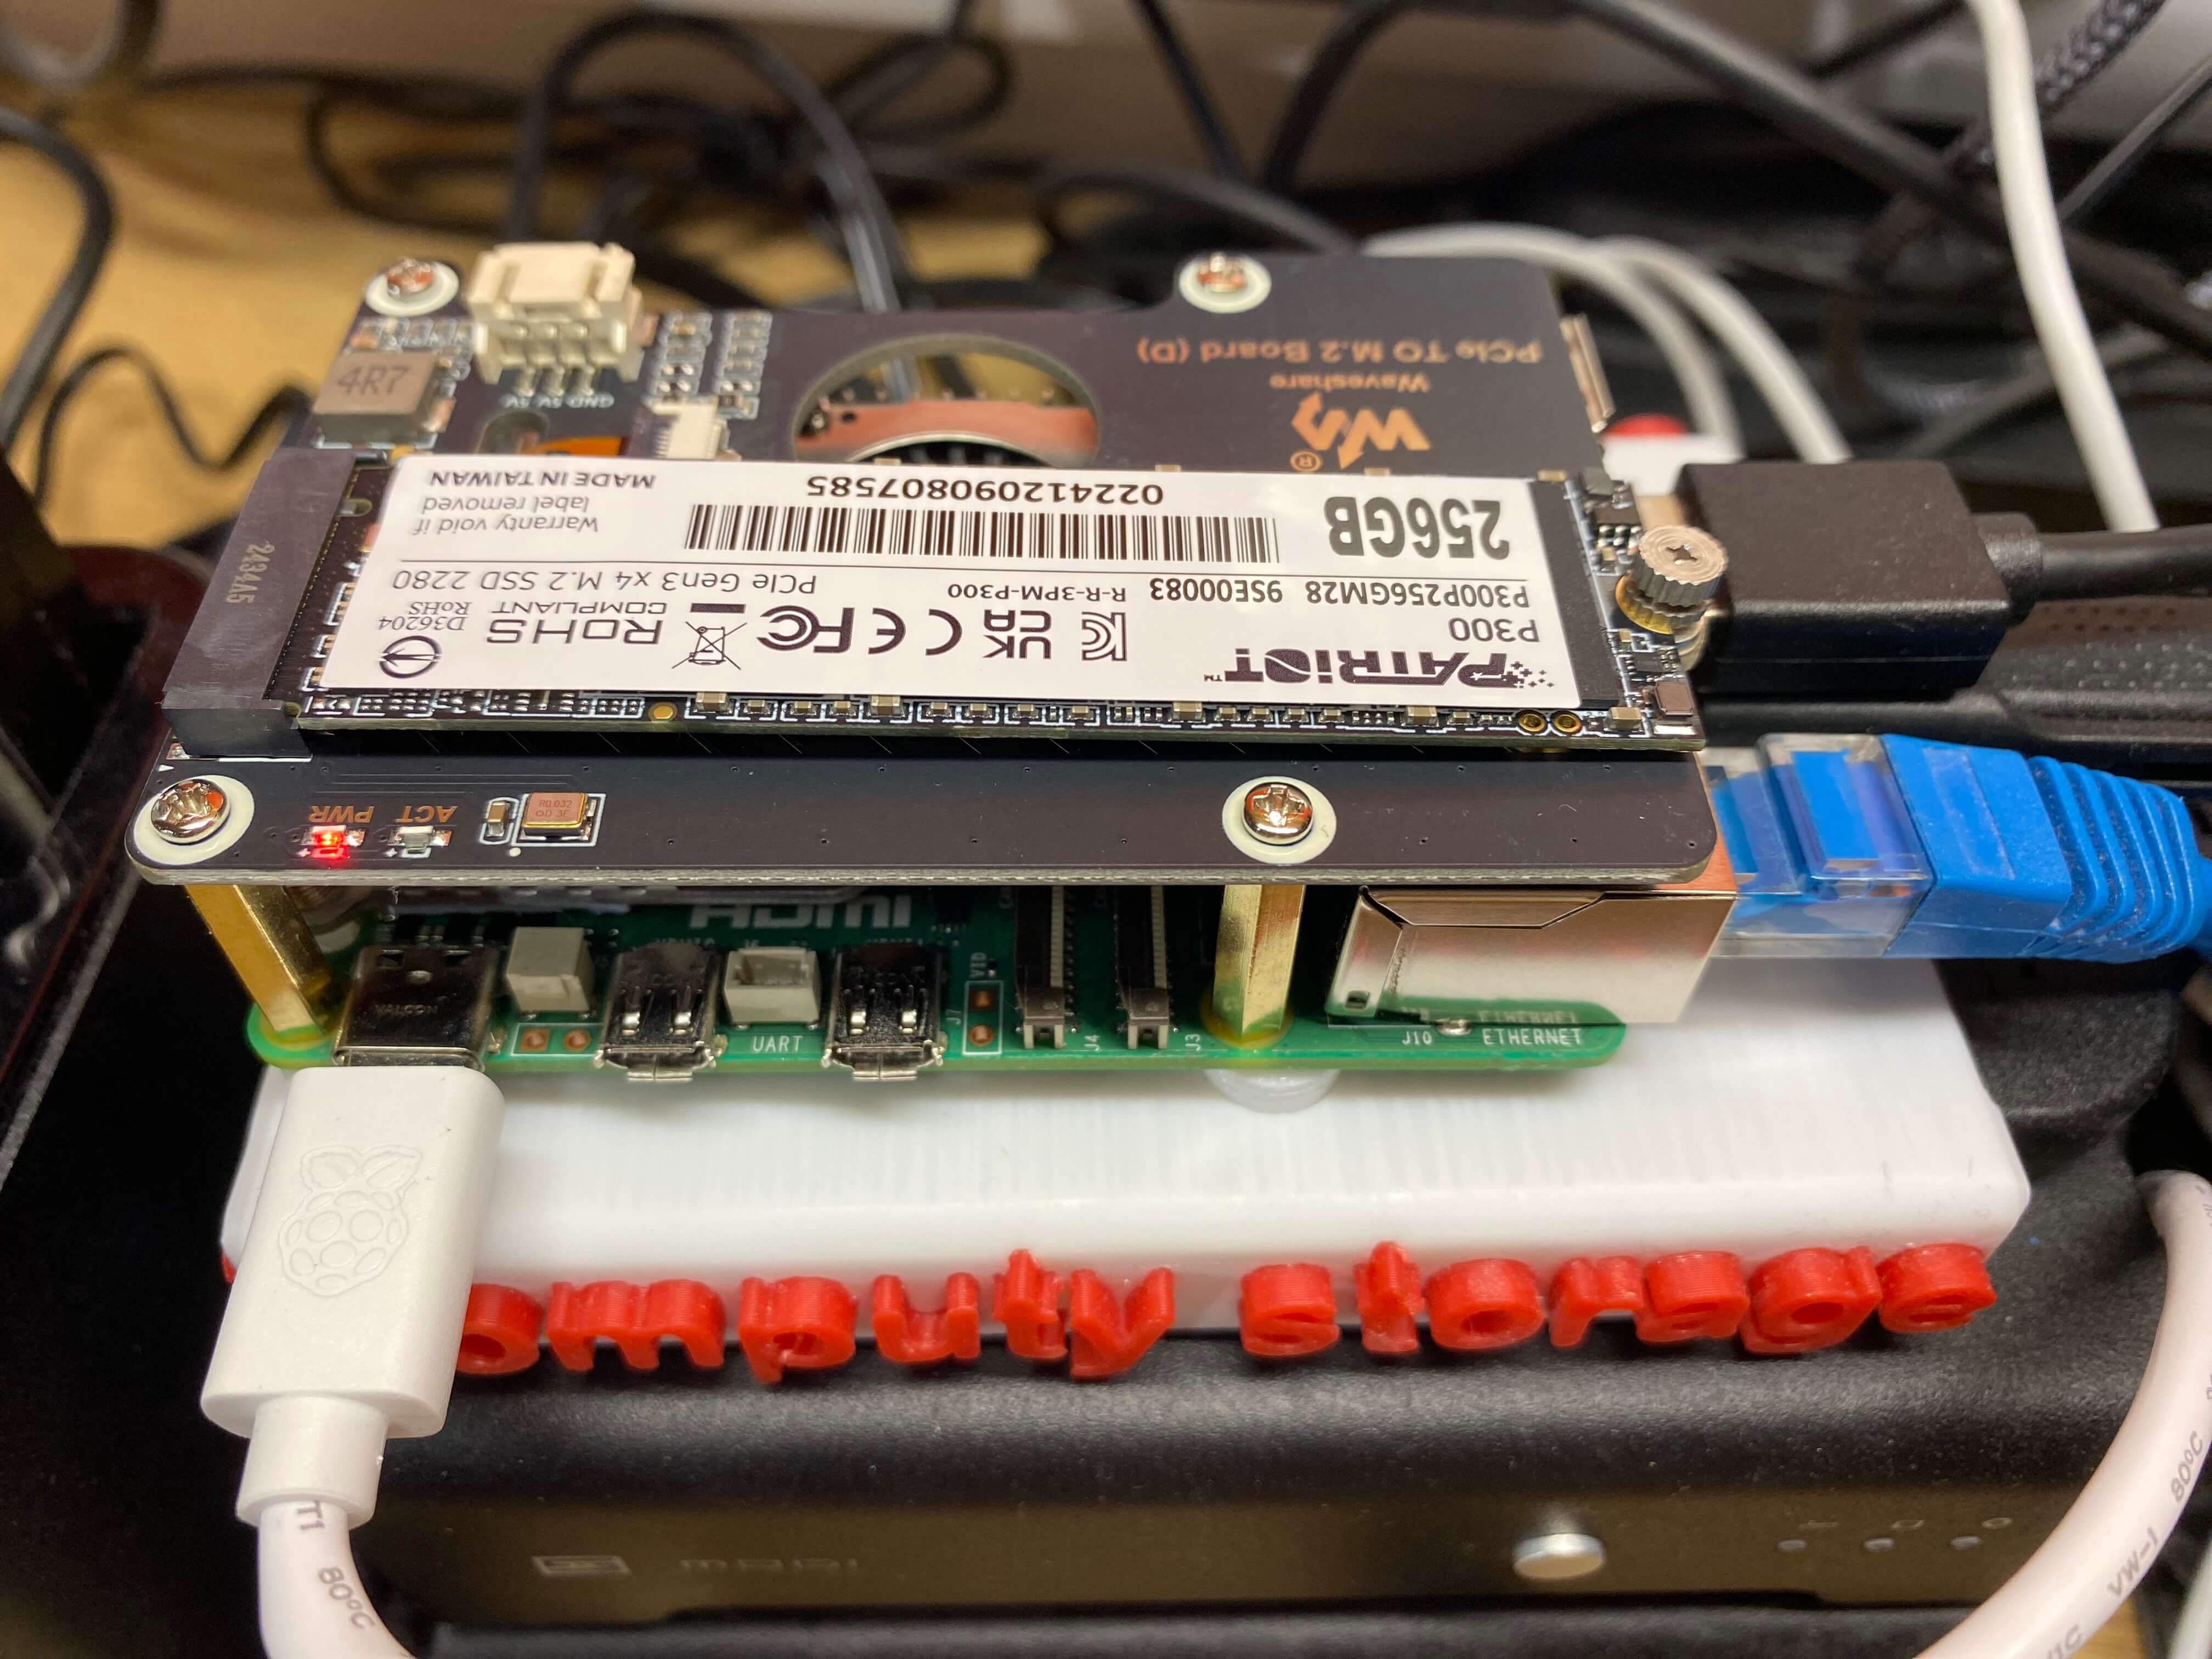
Hardware (closeup in image 2 & 3):
- Used PI5 from Ebay with a fan included for £55
- 27W USB-C power supply for £11
- Waveshare PCIE to M.2 Hat from Aliexpress for £1 (using the welcome coupon)
- 256GB Patriot P300 gen 3 NVME SSD for £16
- Used 2TB seagate barracuda HDD with 10k power on hours for £20
- Barely used 960GB MSI S270 SSD for £30
- USB 3.0 duo bay SATA caddy for £20
- USB 3.0 to SATA cable I already got
- Ethernet cable I aready got
-
Hardware usage:
- The PI is used as the server, powered by the 27W power supply.
- There is one singular lane of Gen 3 PCIE exposed on the PI, by using the HAT, I can add an M.2 slot onto the PI.
- The 256GB NVME SSD will be my boot drive for the Raspbian OS
- The 2TB HDD will be my backup drive.
- The 960GB SSD will be where media is stored, a SSD is used despite high price is cause I sleep in the same room, HDD is too noisy.
- The caddy is for housing the 2TB HDD, the 2 bays are for future proving, in case I need to spare a USB 3.0 slot.
- The USB 3.0 to SATA cable is for the 960GB SSD.
- The Ethernet cable lets me connect to the University network through the RJ45 ports in my dorm.
3D printed parts
-
The parts (Seen in image 2):
- Case for the PI5.
- Case for the 960GB SSD, with a no screw locking system.
- Anti vibration TPU feets.
-
How did I create them?
- All the parts are printed with my dorm room 3D printing setup, it is also in my projects page.
-
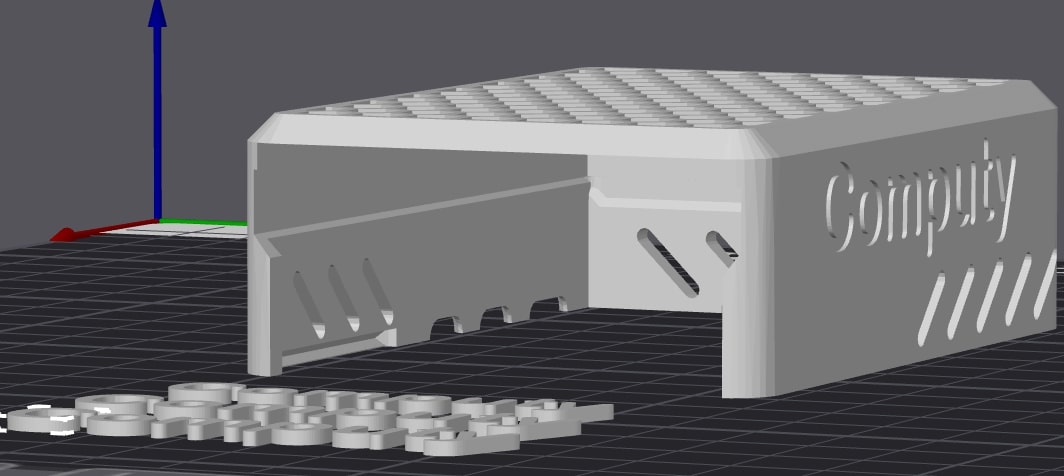
For the PI5 case (3D render in image 4):
- Customized a generic Pi 5 case in Fusion 360 with letter indentations on the outer wall and a notch in the inner wall to fit the HAT.
- Printed the case in PETG to prevent thermal warping.
- Printed the letters in PLA and superglued them into the indentations for perfect alignment.
-
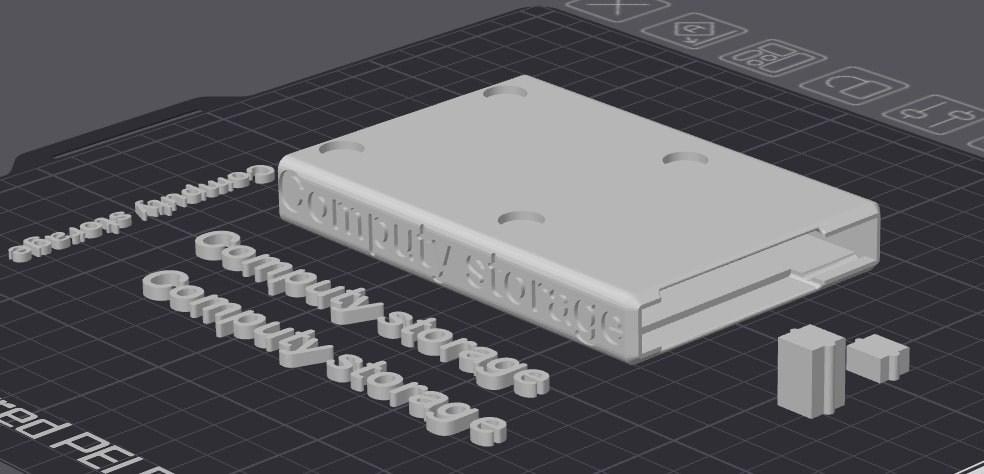
For the SSD case (3D render in image 5):
- I took a 2.5 inch SSD case with a very clever screwless locking system, and again with Fusion360 added letter indentations.
- I added indentations for the anti-vibration feets, positioned to match the spacing of the four main screw holes on the Pi 5.
-
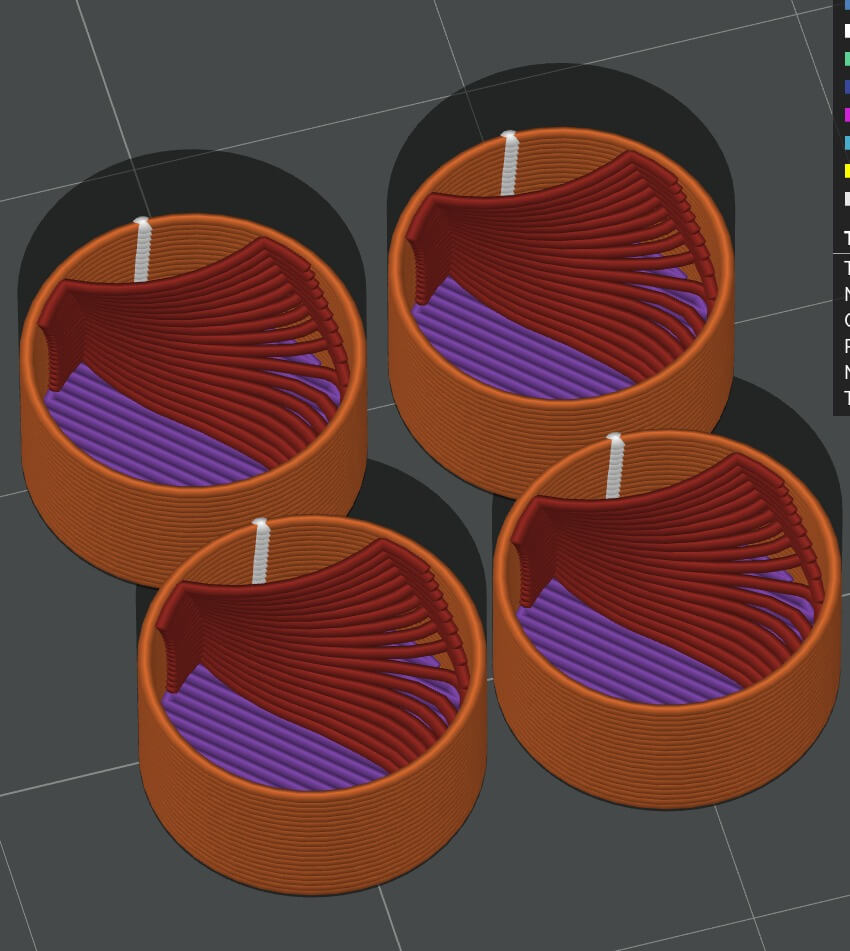
For the anti vibration feets (3D render in image 6):
- They are very much needed, as I sleep in the same room as the server.
- To maximize dampening, the feets have a single-wall structure with a wave-like infill pattern.
Network Configurations
-
What I have done:
- Conenct server to the University network.
- Creating a VPN between my devices.
- Setting up a firewall.
-
Connecting server to the University network:
- I followed this useful guide from the IT department, you can adjust this according to your network manager.
- For Ubuntu based Linux distributions, follow this guide.
-
Creating a VPN between my devices:
- This ensures security and being able to access the server outside of the University network.
- As the server is connected to the University network, anyone can attempt to access it if services like SSH or web servers are exposed and not properly secured.
- This will allow us to block all inbound traffic to the server except via the VPN.
- Tailscale is the simplest solution to create a mesh VPN.
- I simply downloaded Tailscale on all my devices and configured them to be in the same Tailnet.
-
Setting up a firewall
- The firewall's main purpose is to block all inbound traffic.
- This is simple with the Linux kernal bundled UFW firewall (uncomplicated firewall).
- I simply setted up a rule to block all inbound traffic.
- Tailscale by defult bypasses UFW, so you can send inbound traffic to the server as long as they are within the same Tailnet.
- After this is setted up, you can run a SSH server on the server safely and do not need to be physically connected to the server to work on it.
Media steaming server
-
What I have done:
- Organising my music library with Beets.
- Setting up Jellyfin media steaming server.
- Setting up Jellyfin clients on my devices.
- Creating scripts to manage my music library.
-
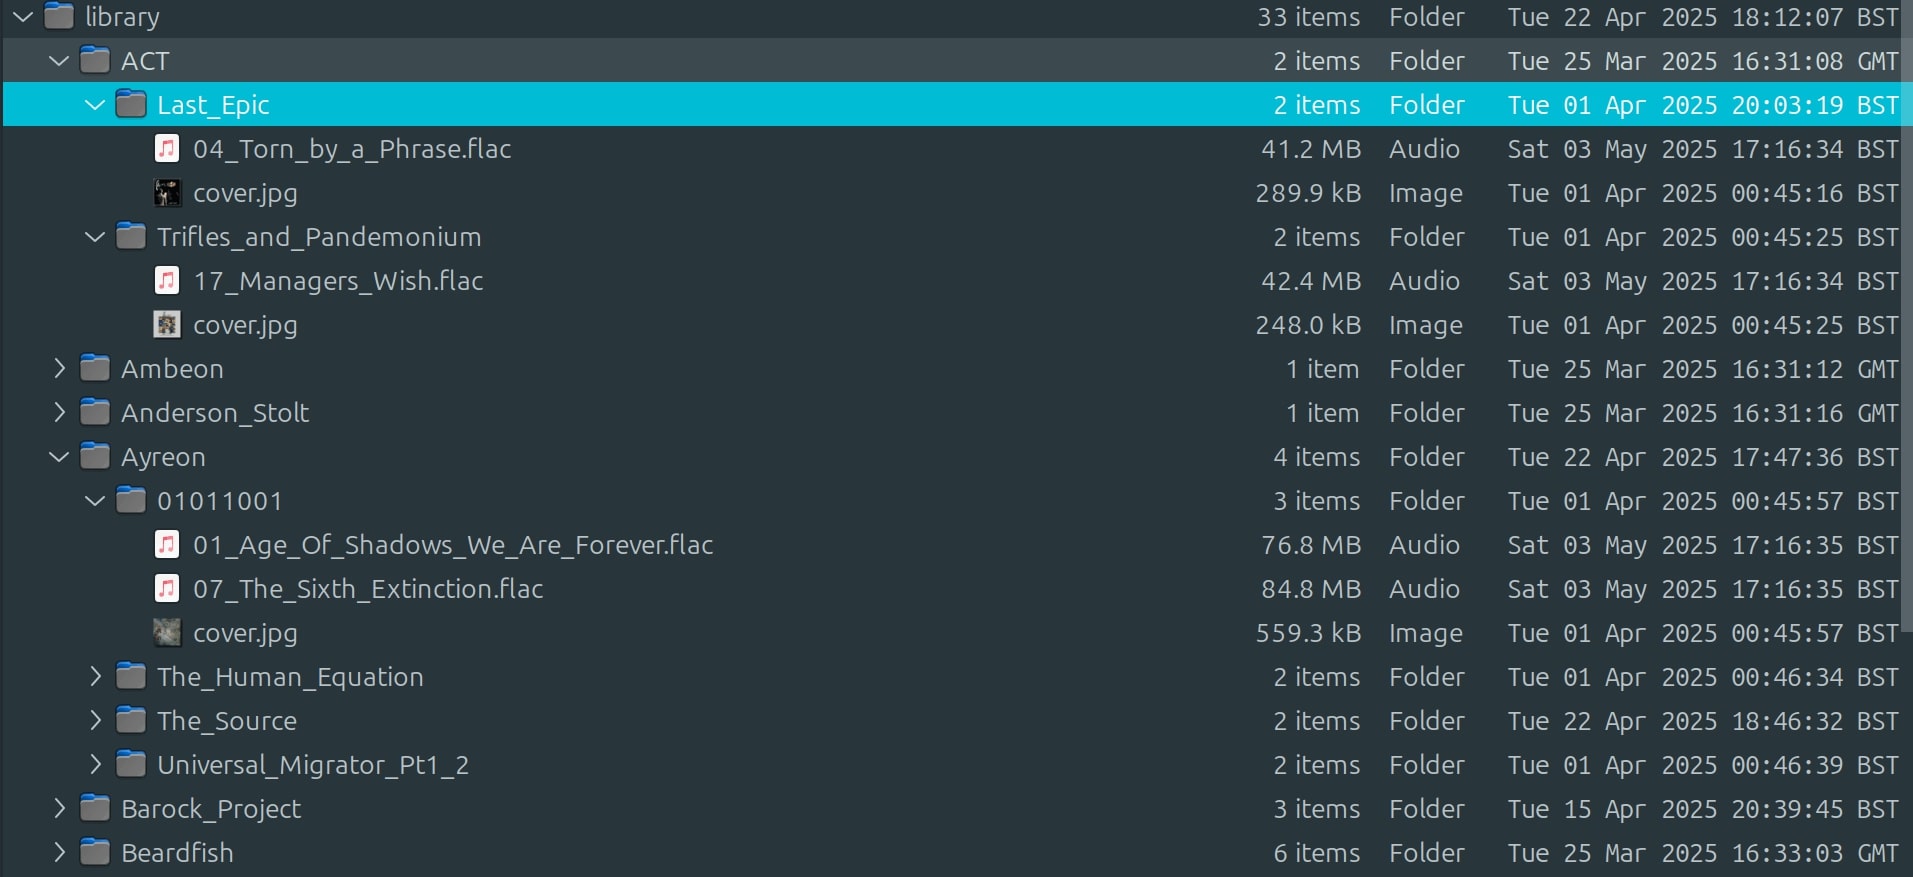
Organising my music library with Beets (see my organised music library in image 7)
- My music library was a mess, a single folder containing 100s of FLAC files in random album folders.
- The embedded metadata tags on the FLAC files are also horrible, this is bad news as Jellyfin cataloges music files with metadata tags.
- Beets is a python commandline tool that I uses to ensure a consistent file structure, fetch lyrics, art and other metadata from the internet, and remove duplicated files.
-
I organised my library in the following structure:
                        /library

                        //artist1

                        ///album1

                        ////album_cover.jpg

                        ////track1.flac

                        ////track2.flac

                        ...

                        //artist2

                        ...
-
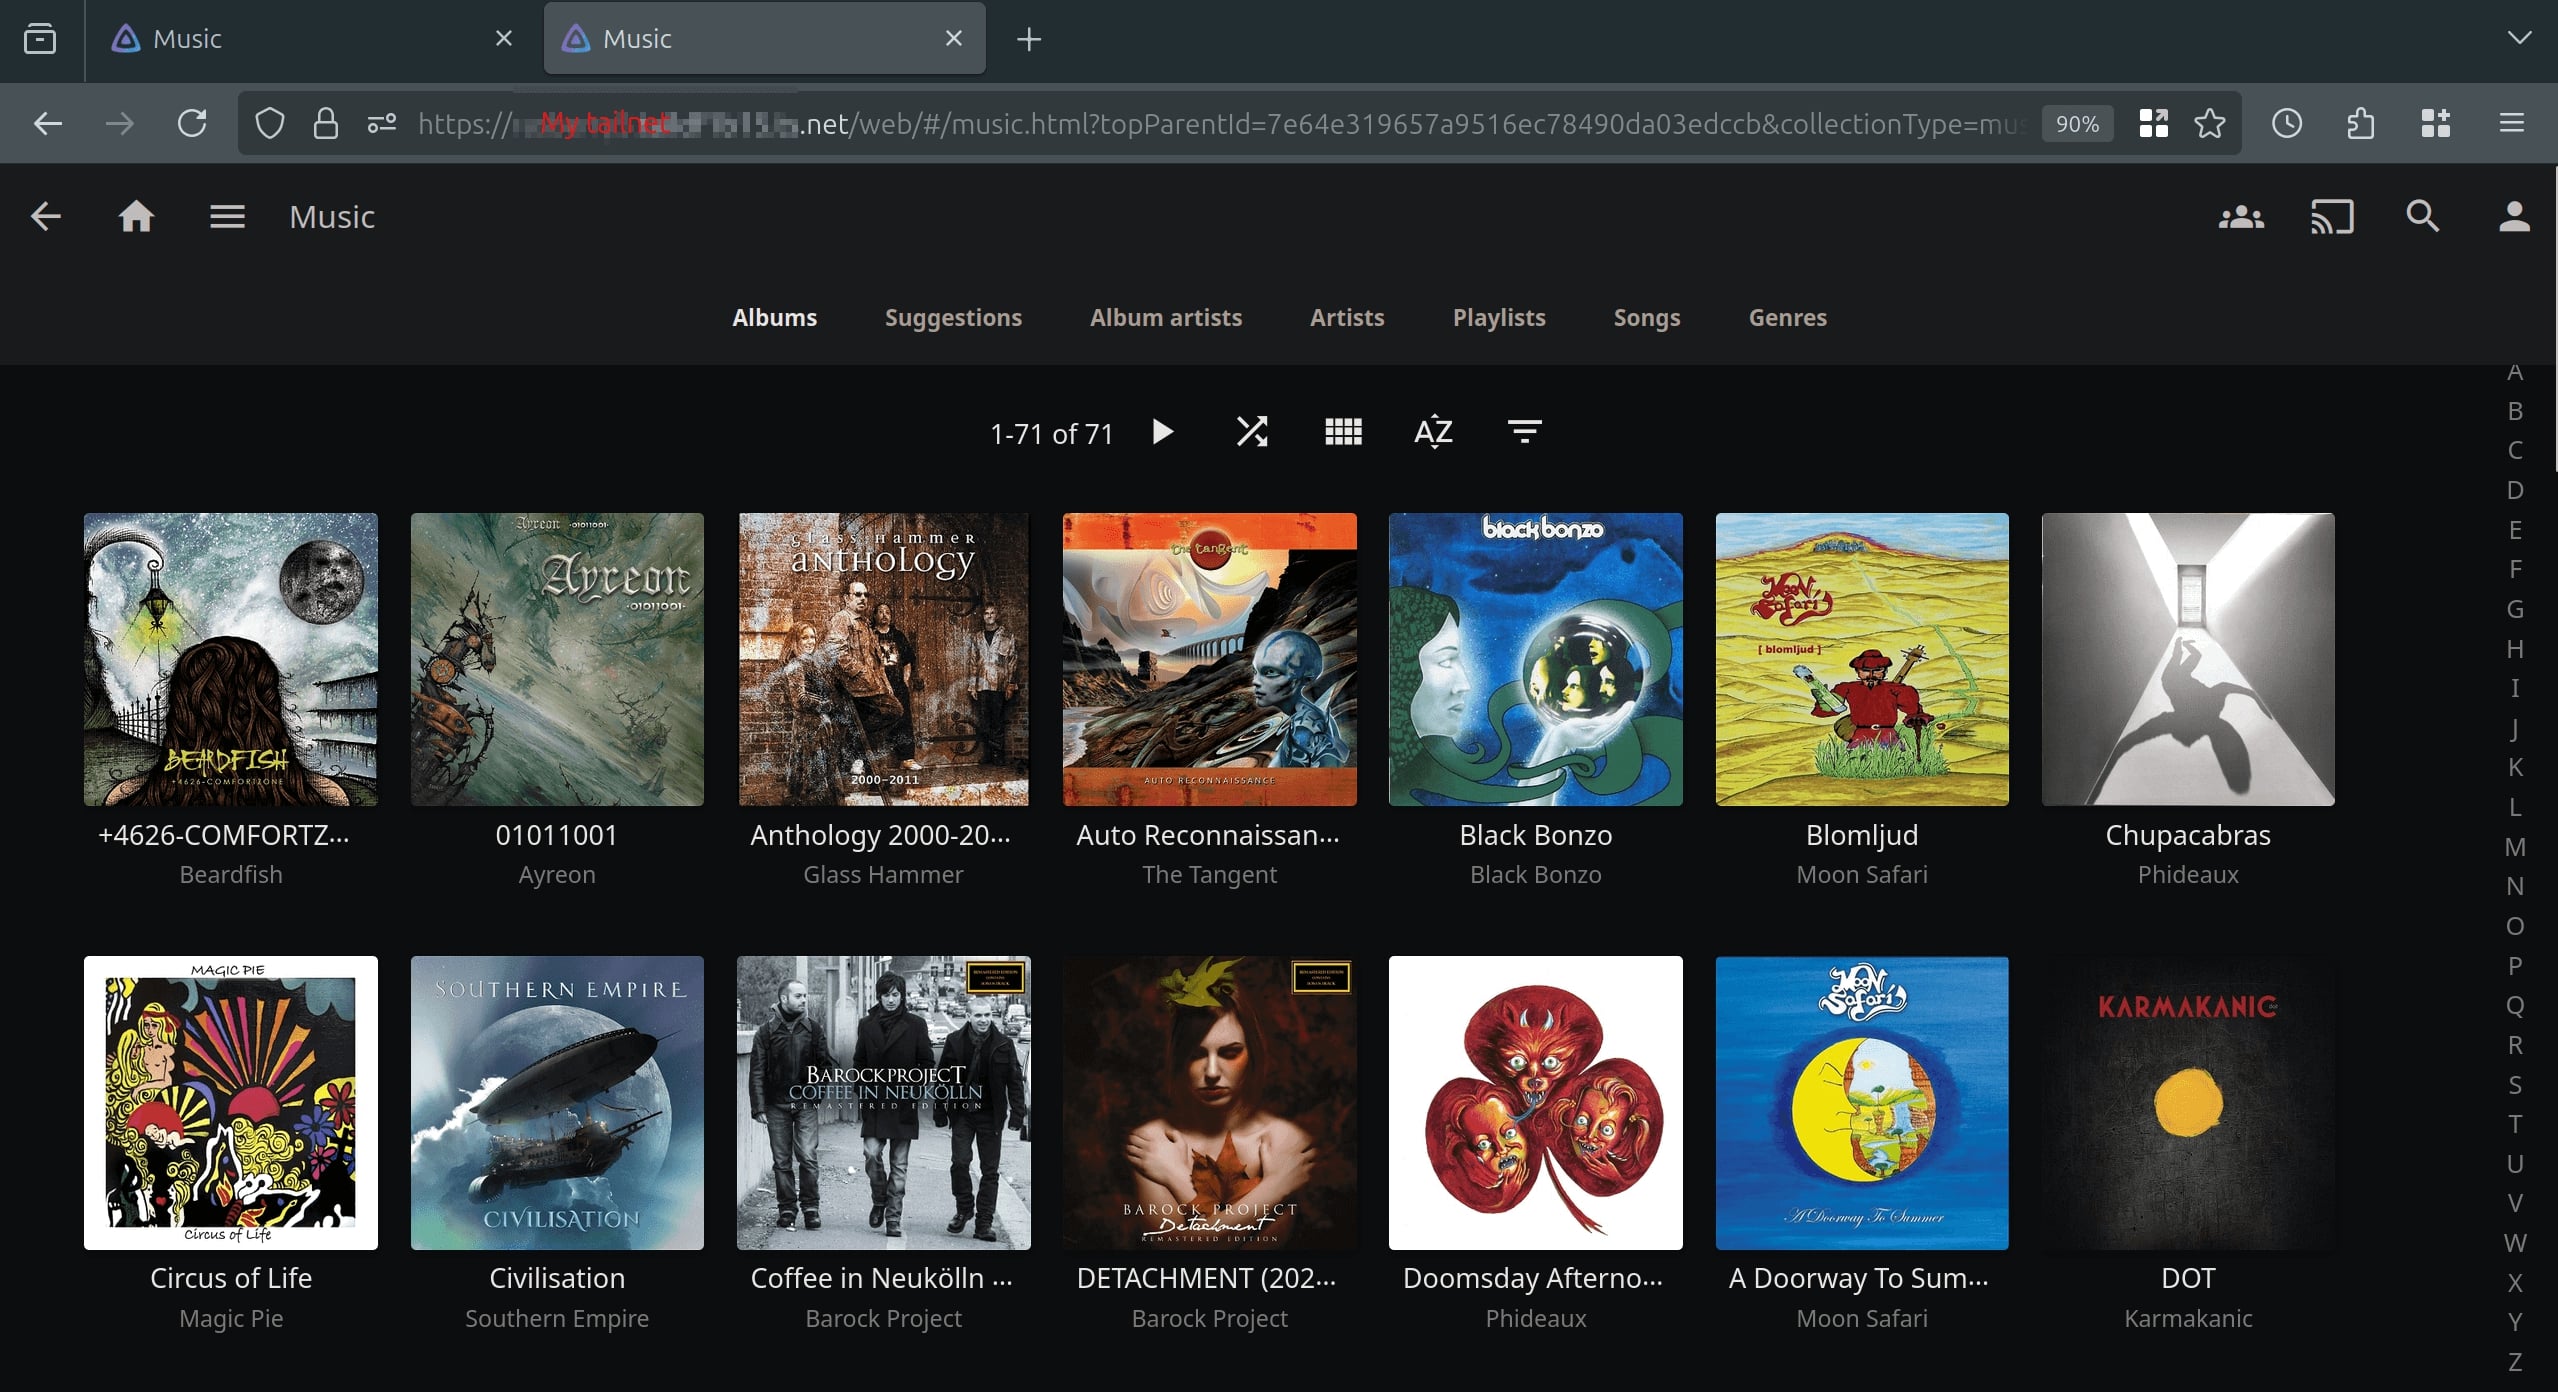
Setting up Jellyfin media steaming server (see the setted up web GUI on image 8)
- Jellyfin is a free, open-source media steaming server software.
- I will use it to steam my music library and movies to my other devices.
- I simply downloaded the Jellyfin server software and followed this guide to install it.
- With that I have a media server running on port 8096 on my server, where all devices on my Tailnet can accesss with `myserver-tailnet-ip:8096` with a browser
- For extra security, I used the `tailscale serve` feature on port 8096, so all steaming connections are encrypted by HTTPS.
- Configurations are done on the webserver itself, after following the setup wizard and configuring some annoying EXT4 file permissions, I now have a media steaming server running in my dorm!
-
Setting up Jellyfin clients on my devices
- I can access my media streaming server by using a web browser, but the web client lacks features.
- So downloaded a Jellyfin client called Finamp, which is also a free, open source software that is built for Jellyfin on my mobile devices.
- Finamp lets me download music in any format (MP3, AAC, etc.) for offline listening, supports background playback, and offers more features on my mobile devices.
- For my laptop, I will not be using Jellyfin to access the music files.
-
Creating scripts to manage my music library
- Click the `find on github` button above to see those scripts.
- The scripts include a script that syncs my M3U music playlists to my Spotify account
- Also one that splits my playlist into 100-song chunks, so I can sync them to my downloads automaticly in Finamp, without using too much storage.
- The last one I will mention is a script that turns my M3U playlists to Windows file format, so I can use them on my windows partition on my laptop.
- All of the scripts are running via cron jobs automaticly.
NAS
- A network attached storage is as the name said, stroage attached to a network, in this case the network is my Tailnet.
- I used Sambas, the free and open source software that allows file shareing between Linux/Unix systems and windows.
- The university uses the same software to allow each student to have their 5GB of free storage.
- Editing the Sambas config file, I shared my 960GB SSD to my tailnet.
- I then mount the Sambas share as a network drive on all my devices.
Accessing music library on my laptop:
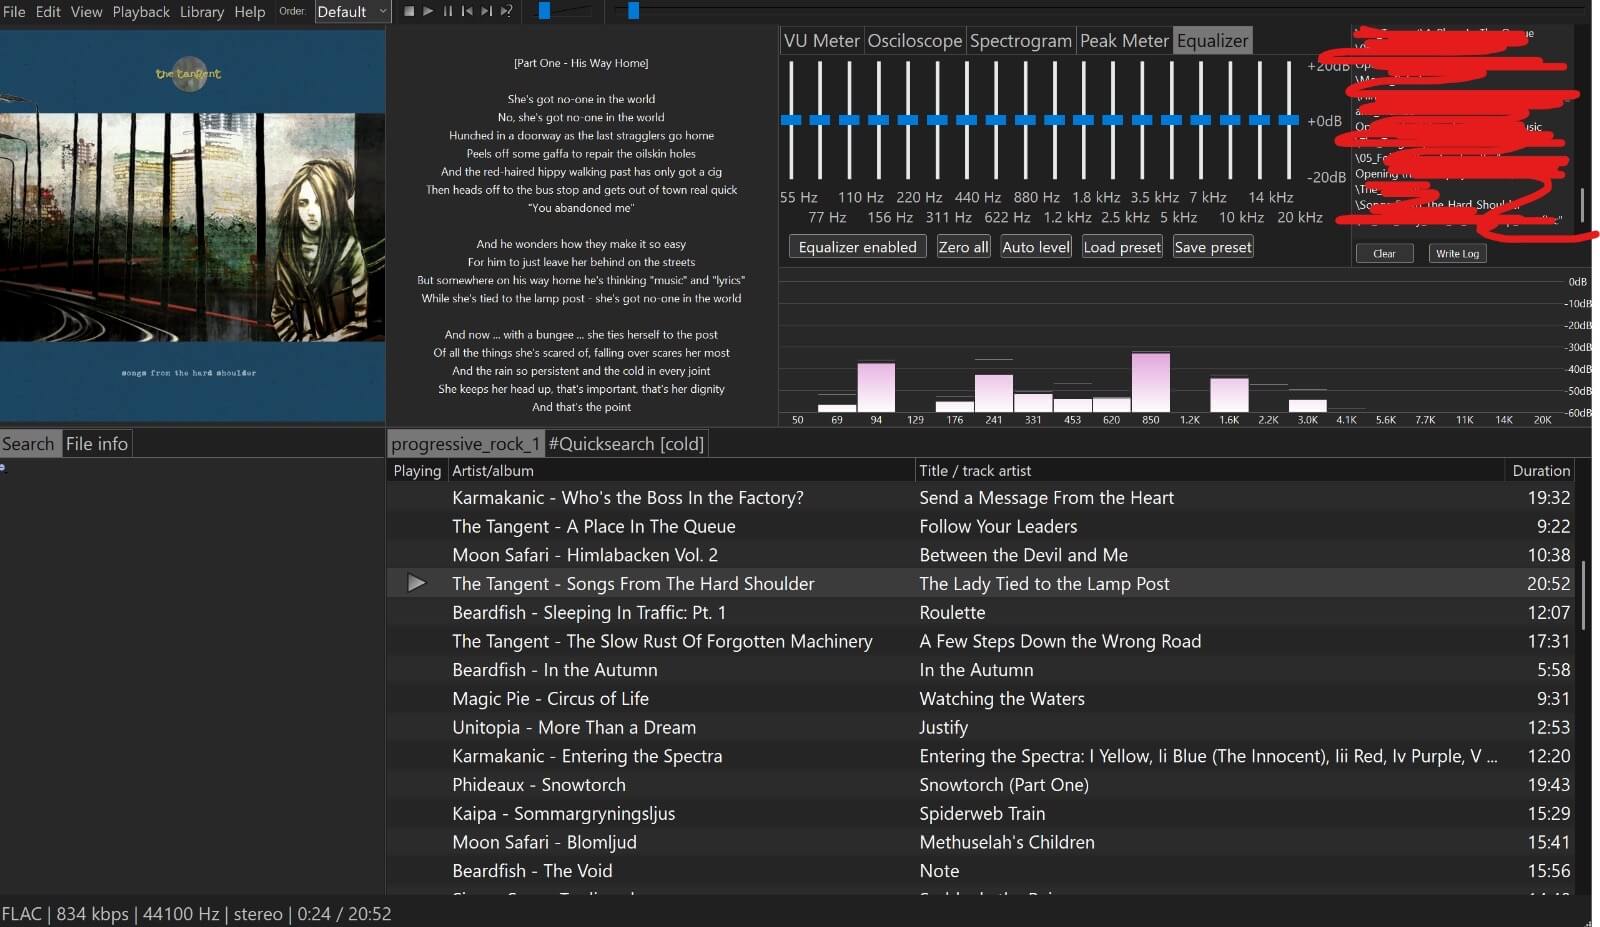
- Jellyfin is useful for steaming media, but it doesn't allow you to copy, edit, or manipulate the media files.
- It also doesn't allow for advanced playback features, like DSP support and have limited audio focused plugins.
- Therefore, I uses a audio player called Foobar2000 and its Linux equivelance, the DeaDBeeF player on my laptop (I duoboot both Linux and Windows on my laptop).
- The music player will access the files through the network share as if the files are on my local storage.
- The setted up Foobar2k music player on my Windows partition can be seen in image 9
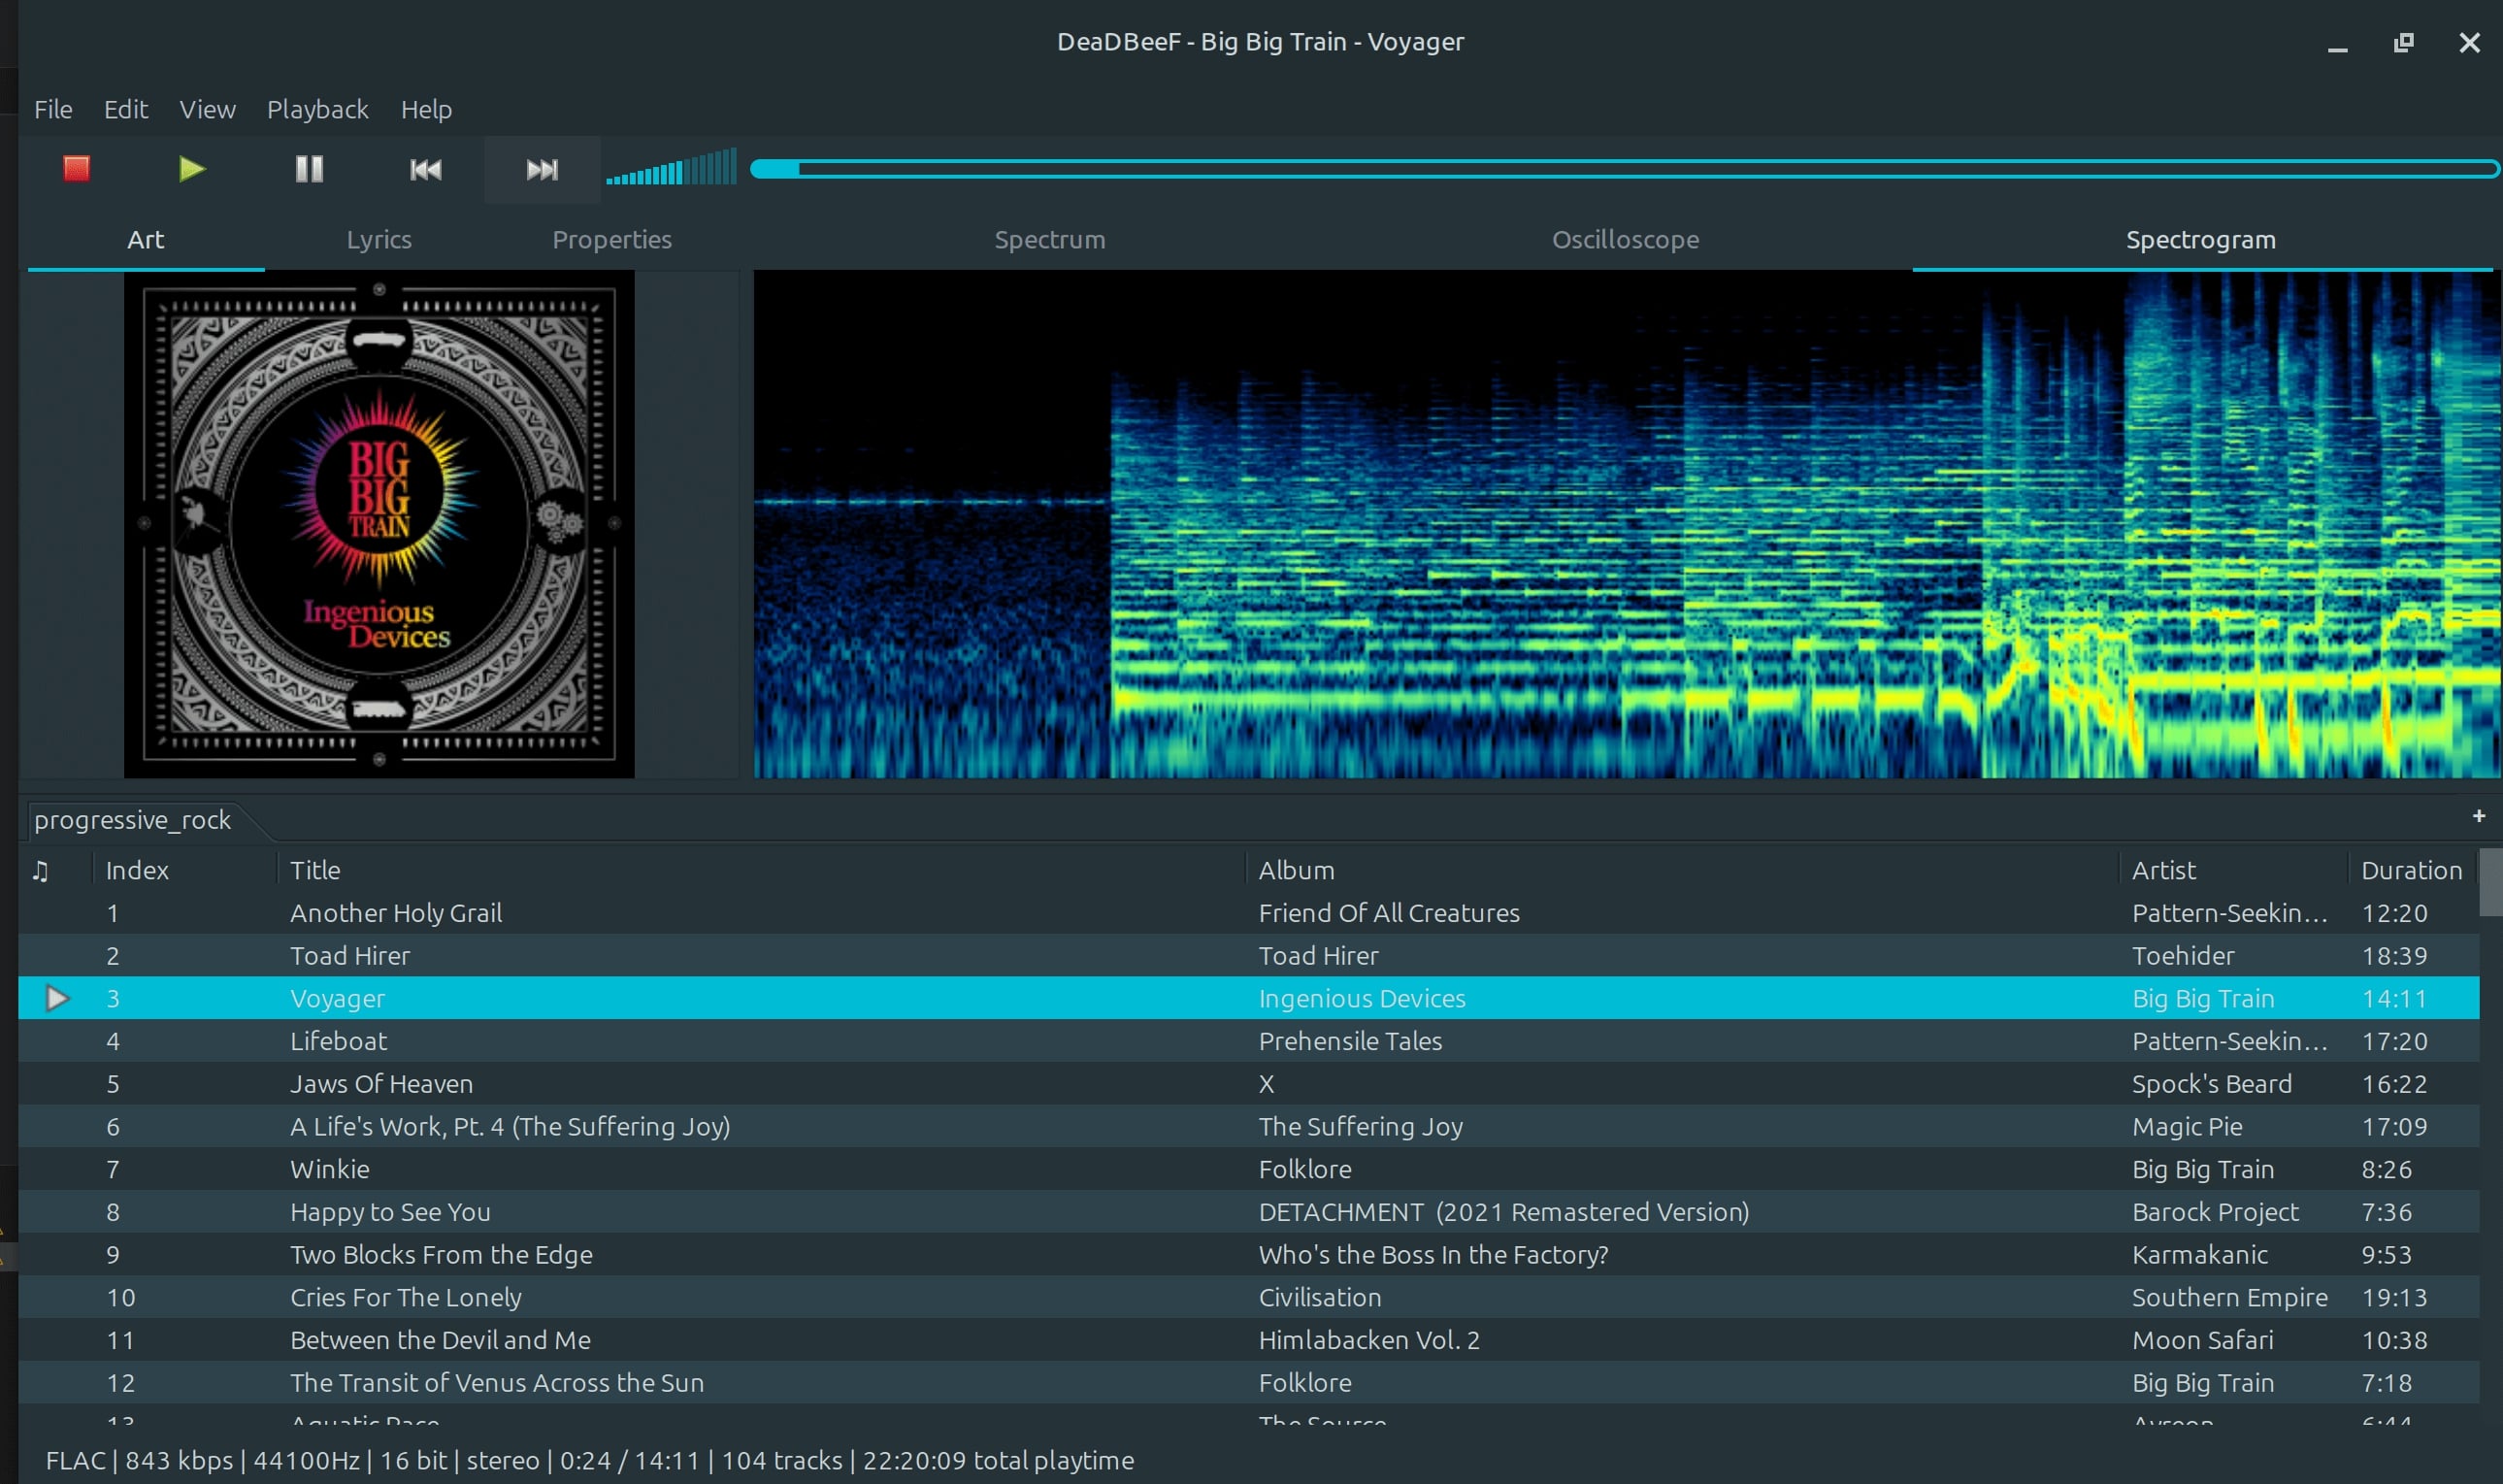
- The setted up DeaDBeeF music player on my Linux partition can be seen in image 10
Backups
- Borg is another free and open-source software I used in my server.
- It provides fast, secure and space-efficent backups, through deduplication, compression and encryption.
- The 960GB SSD on the server backups to the 2TB HDD everyday on 5am via a cron job.
- For my Linux partition on my laptop, a startup script backups my laptop to the 2TB HDD via SSH if I haven't done so that day.
- The 2TB HDD itself then backup to the cloud with SSH via another cronjob to achieve 3-2-1 backup.